Auditing in Salesforce
For any platform, proper audit mechanisms ensure complete security and compliance of the system. Proper audit mechanisms ensure complete information about the system, which can be reviewed in an event of a potential security breach or even system downtime. However, a common misconception is that the audit mechanisms secure the platform. This is not true at all. An audit doesn’t secure the system, rather it ensures, that all the security practices and policies are in place. In an organization, there is a compliance team, who generally perform the periodical audits, and document the audit results. These audit results are reviewed with the top management. Salesforce doesn’t document any best practice for Audits, but we can make use of certain components, to conduct an audit.
Checking record modification fields
Every object will have fields that store key information such as who has created the record, who modified it last, and who accessed it. This provides the very information about the records. For example, there is a customer case created, and later some other users accepted it. Through the audit, we can find out the complete trail of the case record, like who created, who accepted it, and who was the last person who worked on it.
Login History
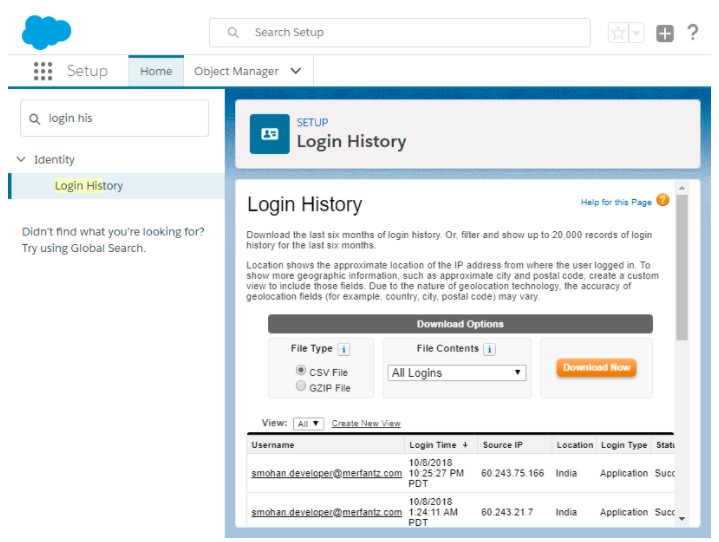
Login history will elaborate on all the data pertaining to logins to the Salesforce platform. It will show the successful logins, as well as failed login attempts for the last six months. As an admin, we can always monitor the login attempts to the org and the communities. The login history page will display 20000 records at a time, that will span for the last 6 months. If we want to analyze this data in detail, then we can download it in CSV or GZIP format, and analyze it on our system. Login history will elaborate on the following details.
- HTTP Login Method: This will provide the information in the HTTP method used for the session login. The value could be either GET, POST, or unknown. This will help to identify if a user unintentionally exposed his credentials through a GET request. GET request is often used by the attackers to retrieve information from a website, once the TCP connection is established.
- SAML Single Sign-On: This will elaborate if the org uses SAML SSO identity provider certificates or not.
- My Domain: This will show if the user is logging in with My Domain URL.
- License Manager Users: This will provide information about users who are associated with the License Management APP.
Accessing Login History
Go to Setup, and from the quick find box, go to “Login History”. If you want to see the data in a specified view, click on “Create New View”.Different filters can be used for creating views. In a view, we can have only 15 records per page. Click on the “Download Now” option to download the login history data.
Field History Tracking
In Salesforce, we can track certain specified fields. The history of the tracked field can be accessed. Field history data is retained for the last 18 months. The storage of the field history data is not counted in the allocated storage for org. So, the field history data is no going to eat up the org storage limit. Field history can be tracked for both the custom objects as well as standard objects. We can also disable the tracking when it is not required. To do this, we can go to the management settings for the Object, and then go to fields. On that field click on “Set History Tracking”.
For example, you want to disable the tracking for Account, then uncheck the option “Enable Account History”. If you want to enable it back, check the box. With the help of Field Audit Trail, we can retain the archived field history data for 10 years. Some of the global standards such as HIPAA and GDPR mandates retention of the archive data, and that is where this utility can be extremely handy.
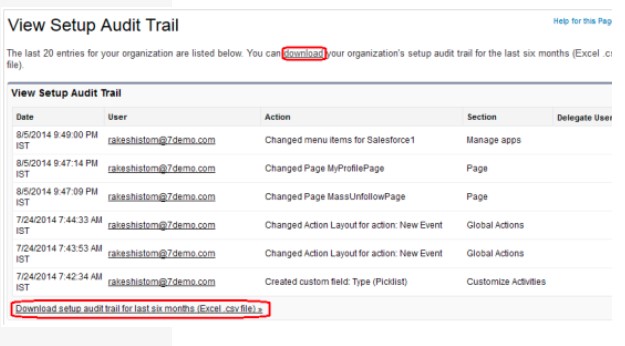
Setting up Audit Trail
Setup is just like the control panel of the Salesforce. We can configure and manage everything from the Setup module. Hence, we must keep a trail of all the changes that have been made up to the Setup. This can be done by setting up the audit trail. This can be done in a few simple steps given below.
- Go to Setup.
- From the quick find box, go to “View Setup Audit Trail”.
- Click on the “Download” option to download the setup history for the last 180 days.