
React - Introduction to JSX
React documents are saved as .js or .jsx files. JSX which stands for JavaScript and XML is a template object which makes writing React faster, easier, and more readable because it is written like an HTML template but at runtime is compiled to JavaScript.
JSX is written like this:
import React from "react";

class App extends React.Component {
  render() {
    return <div>Hello React! </div>;
  }
}

export default App;
Result:

The HTML wrapped around the render and return methods are JSX. JSX allows us to create HTML elements in JavaScript without methods like createElement () and appendChild(). Do not worry about what ‘React’ and ‘React.component’ mean now. It will be explained in later topics.
Why JSX
Writing in JSX is not required but it is highly recommended as there are many advantages involved in writing this way:
- It is faster as Babel optimizes the code at runtime.
- It is faster to type, check for errors and debug
How to use JSX
- JSX Writing: JSX is similar in writing to HTML. In the return statement of the component, the HTML code is written there:
import React from "react";

class App extends React.Component {
  render() {
    return <div>Hello There! </div>;
 }
}

export default App
- Nesting in JSX: In cases of multiple elements (h1, p, span) like in nesting of elements, they must all be wrapped around one container like a <div>:
import React from "react";
class App extends React.Component {
  render() {
    return (
      <div>
        <h1> Hello React! </h1>
        <p>I am Learning React</p>
      </div>
    );
  }
}

export default App
Result:
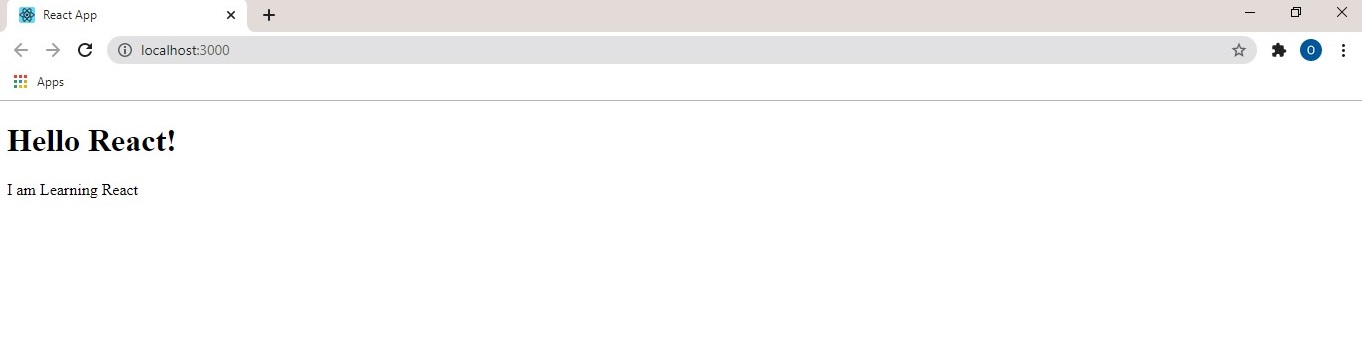
In the above example, a <div> container wraps two elements (h1 and p) with the <p> tag being nested in a <h1> tag.
A <p> tag cannot wrap a nested <div> element and an inline-element cannot wrap a block element.
- Writing JavaScript expressions in JSX: JavaScript code is written in a
{}bracket. For example, The<p>tag below renders 4 because{2+2}is a JavaScript expression equal to four.
import React from "react";
class App extends React.Component {
  render() {
    return (
      <div>
        <h1>What is 2 + 2</h1>
        <p>{2 + 2}</p>
      </div>
    );
  }
}
export default App
JSX will often throw an error if one or more of the rules are not followed.
Styling/React CSS
React can be styled in many ways, two of the most popular ones are discussed here:
Inline styling
To style an element, the style attribute has to be a javascript object, like so:
Classes attribute in JSX are written as className instead of class:
import React from "react";

class App extends React.Component {
  render() {
    return (
      <div className="App">
        <p style={{ color: "blue" }}> I am blue</p>
      </div>
    );
  }
}
export default App
Result:
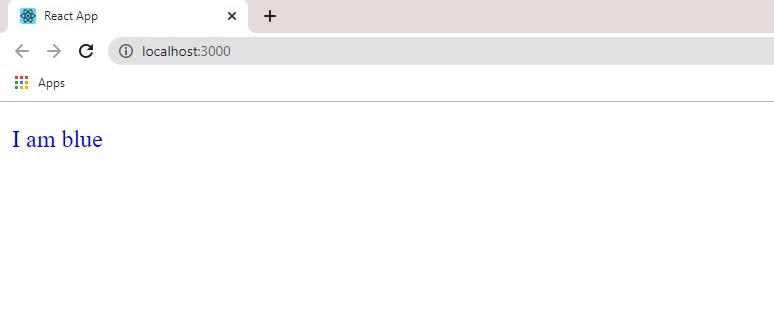
The inner bracket is the styling object, while the outer bracket wraps the JavaScript expression(object) as mentioned in earlier in the tutorial.
External Stylesheet
Create a stylesheet file in the src folder such as ‘app.css’, then import it in App.js like this: ‘import ‘./app.css’. You have successfully added a stylesheet to your app and can now style the elements in the stylesheet file.
Comments
Comments in React are written as {// } or {/**/} for consistency and easy recognition throughout development.
Naming Conventions
HTML tags are written in lower cases while Components (App.js is a component) are written with the first letter in capital letters.
React DOM properties such as onclick, onmouseover in HTML are written in camelCase such as onClick, onChange and onMouseover.
Styling properties: backgroundColor, paddingLeft etc