
Introduction:
In today's world, websites are an essential part of any business or individual who wants to reach out to their target audience. There are various hosting services available for websites, including traditional web hosting services and cloud hosting services. One such cloud hosting service is Azure Storage Service, which provides an excellent option for hosting static websites. In this article, we will go through a step-by-step guide on how to host a static website using Azure Storage Service.
What is Azure Storage Service?
Azure Storage Service is a cloud-based storage solution offered by Microsoft Azure. It provides different storage options such as Blob storage, File storage, Queue storage, and Table storage. One of the most popular use cases for Azure Storage Service is to host static websites.
Static websites, devoid of server-side processing or database interaction, consist solely of HTML, CSS, and JavaScript files. Azure Storage Service offers a simple hosting solution for these sites through its Blob storage option. Consider exploring an Azure course to further enhance your understanding of these hosting capabilities.
Set up an Azure Account
The first step in hosting your static website with Azure Storage is to create an Azure account if you haven't already done so. Simply visit the Azure website and follow the instructions to sign up for an account. You may need to provide some basic information and set up billing details, but don't worry, Azure offers a free tier with certain limitations, which is perfect for hosting a small static website.
Step-by-Step Guide to Hosting a Static Website with Azure Storage Service:
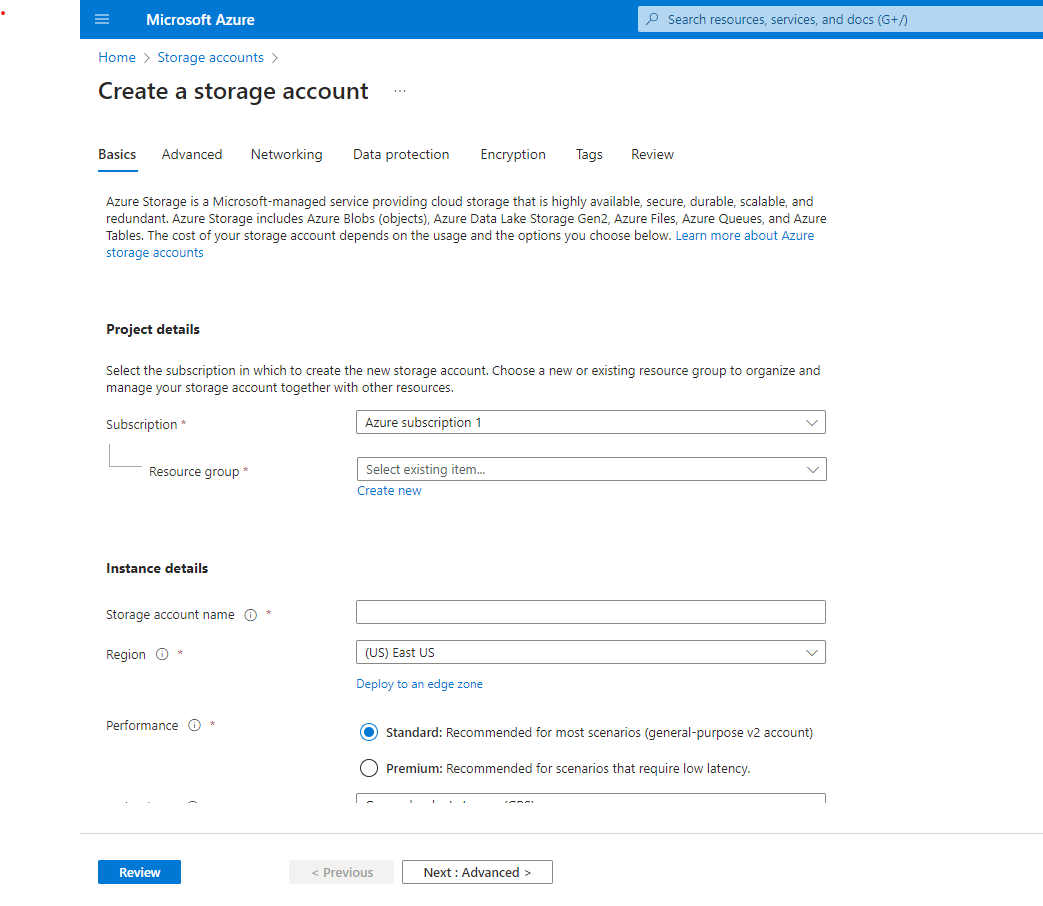
1. Create an Azure Storage Account
The first step in hosting a static website with Azure Storage Service is to create an Azure Storage Account. You can create an Azure Storage Account by following these steps:
- Login to your Azure portal
- Click on the "+ Create a resource" button on the top left corner of the page
- Search for "Storage Account" and select it
- Click on the "Create" button
- Fill in the required details such as subscription, resource group, storage account name, location, and performance options
- Click on the "Review + create" button
- Review the settings and click on the "Create" button
2. Enable Static Website Hosting
Once you have created an Azure Storage Account, you need to enable static website hosting. To enable static website hosting, follow these steps:
- Go to your Azure Storage Account
- Click on the "Static website" option in the left-hand menu
- Click on the "Enabled" button to enable static website hosting
- Enter the "Index document name" and "Error document path" fields
- Click on the "Save" button
3. Upload Website Files to Blob Storage
After enabling static website hosting, you need to upload your website files to the Blob storage container. To upload website files to Blob storage, follow these steps:
- Go to your Azure Storage Account
- Click on the "Containers" option in the left-hand menu
- Click on the "+ Container" button to create a new container
- Enter the container name and select "Blob" as the access type
- Click on the "Create" button f. Click on the newly created container
- Click on the "Upload" button to upload your website files
4. Set Container Properties
After uploading your website files, you need to set the container properties to allow public access. To set container properties, follow these steps:
- Click on the "Access policy" option in the left-hand menu
- Select "Blob" as the "Public access level"
- Click on the "Save" button
5. Test Your Website:
Once you have uploaded your website files and set container properties, you can test your website by following these steps:
- Go to your Azure Storage Account
- Click on the "Static website" option in the left-hand menu
- Copy the "Primary endpoint" URL
- Paste the URL in your browser and press enter
Congratulations! You have successfully hosted a static website using Azure Storage Service.
Benefits of Hosting a Static Website with Azure Storage Service:
- Cost-Effective:
- Hosting a static website with Azure Storage Service is cost-effective because you only pay for the storage space used and the data transfer fees. There are no additional costs for server maintenance, security, or software updates.
- High Availability and Scalability:
- Azure Storage Service provides high availability and scalability, ensuring that your website is always available to your users. It also provides automatic scalability, so you can easily handle traffic spikes without any additional configuration.
- Security:
- Azure Storage Service provides built-in security features such as authentication and authorization, encryption, and network security. It also provides compliance with various industry standards such as HIPAA, GDPR, and ISO.
- Easy Integration:
- Azure Storage Service integrates easily with other Azure services such as Azure Functions, Azure CDN, and Azure AD. This allows you to extend the functionality of your website easily.
Conclusion:
Azure Storage Service is an excellent option for hosting static websites. It provides cost-effective, high availability, scalability, security, and easy integration with other Azure services. By following the step-by-step guide provided in this article, you can easily host your static website with Azure Storage Service.
Note: If you're getting ready for an Azure interview, be sure to review these Azure interview questions and answers to boost your chances of success.
Comments (0)