
In this article, we will see how to capture an image/snapshot/Photo from a web camera (WebCam) using Asp.Net Core MVC. In order to capture an image from a webcam, we need to use the "Webcam.js" javascript library, the source code of this library is found in https://github.com/jhuckaby/webcamjs.
We are going to create a simple ASP.NET core application and integrate the "Webcam.js" javascript library to capture the image from your web camera.
Step 1: Create an ASP.NET Core Application
Open Visual Studio 2019 and click "Create a new project" and choose ASP.NET Core Web Application > Provide project name and location
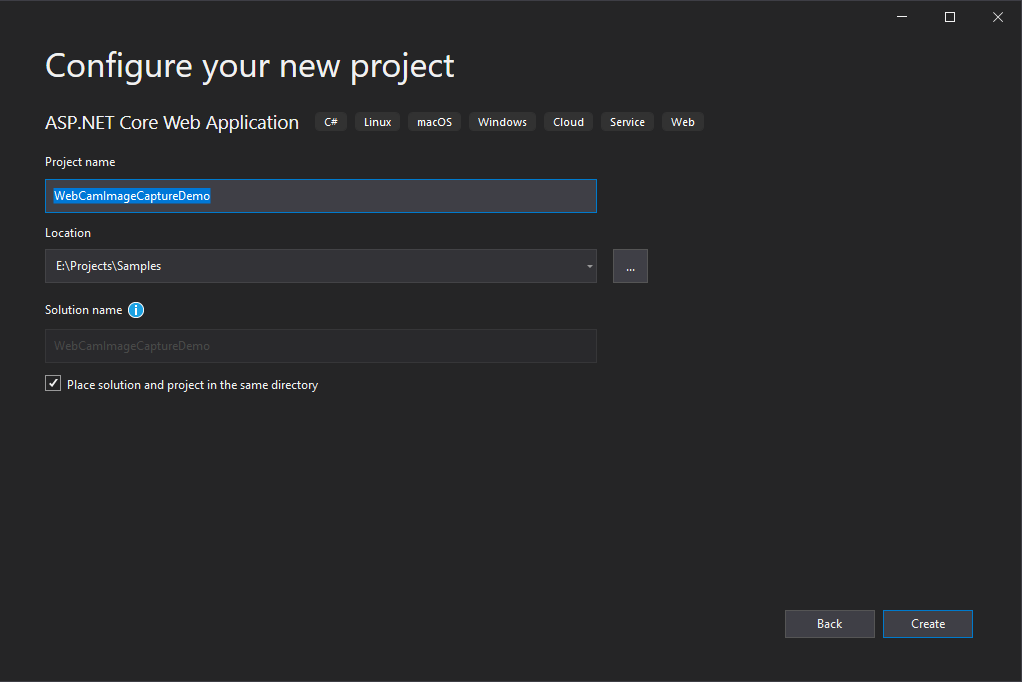
Then choose .ASP.NET Core version and the API template select "Web Application (Model-View-Controller)" as shown below and click "Create",

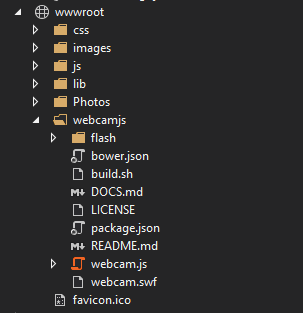
Step 2: Add webcam.js files to the project
Download webcam.js files from https://github.com/jhuckaby/webcamjs and add them to your “wwwroot” folder as shown below,
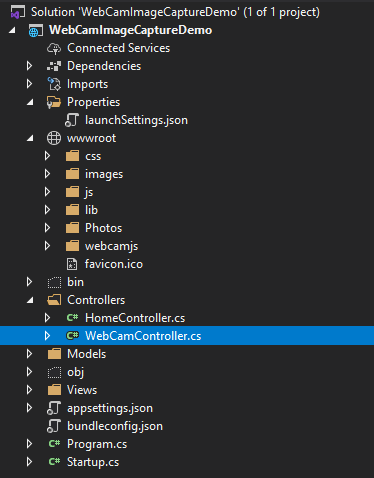
Step 3: Add Controller
Next, we will add a controller called "WebCam" (WebCamController) under the Controllers folder.
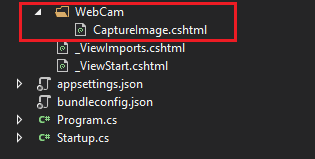
Step 4: Add View
Next, we will add a view called "CaptureImage" under the "View/WebCam" folder as shown below,
After adding the controller and view, we will add the controls and include & use the webcam.js javascript framework to capture the image from the webcam.
<body class="container">
    <div class="col-md-6" style="padding-top:50px;">
        <div class="panel panel-default">
            <div class="panel-heading">Live Web Camera</div>
            <div class="panel-body">
                <div id="LiveCamera" style="margin-bottom:50px;"></div>
                <form>
                    <input type="button" class="btn btn-primary" value="Capture Snapshot" onClick="CaptureSnapshot()">
                </form>

            </div>
        </div>
    </div>
    <div class="col-md-6" style="padding-top:50px;">
        <div class="panel panel-default">
            <div class="panel-heading">Captured Snapshot/Image</div>
            <div class="panel-body">
                <div id="results">Your snapshot will appear here...</div>
            </div>
            <br />
            <br />
        </div>
    </div>

    <!-- Include the Webcam.js JavaScript Library -->
    <script src="~/webcamjs/webcam.js"></script>
    <!-- Configure web cam settings -->
    <script language="JavaScript">
        Webcam.set({
            width: 500,
            height: 375,
            image_format: 'png',
            jpeg_quality: 100
        });
        Webcam.attach('#LiveCamera');
    </script>

    <!-- Javascript code to capture the snapshot and displaying it in the screen -->
    <script language="JavaScript">
        function CaptureSnapshot() {
            Webcam.snap(function (data) {
                // display results in page
                document.getElementById('results').innerHTML = '<img src="' + data + '"/>';
                // Send image data to the controller to store locally or in database
                Webcam.upload(data,
                    '/WebCam/CaptureImage',
                    function (code, text) {
                        alert('Snapshot/Image captured successfully...');
                    });
            });
        }
    </script>
</body>
We have configured the webcam settings such a width, height, image format, and quality of the webcam image as shown in the above code snippet.
Now, we will add the action method code in the controller to store the snapshot or image in the local folder. In the action method, we will read files from HttpContext.Request.Form.Files and store those files locally using new GUID and file stream as shown below,
[HttpPost]
public IActionResult CaptureImage(string name)
{
	try
	{
		var files = HttpContext.Request.Form.Files;
		if (files != null)
		{
			foreach (var file in files)
			{
				if (file.Length > 0)
				{
					var fileName = file.FileName;
					var fileNameToStore = string.Concat(Convert.ToString(Guid.NewGuid()), Path.GetExtension(fileName));
					//  Path to store the snapshot in local folder
					var filepath = Path.Combine(_environment.WebRootPath, "Photos") + $@"\{fileNameToStore}";

					// Save image file in local folder
					if (!string.IsNullOrEmpty(filepath))
					{
						using (FileStream fileStream = System.IO.File.Create(filepath))
						{
							file.CopyTo(fileStream);
							fileStream.Flush();
						}
					}

					// Save image file in database
					var imgBytes = System.IO.File.ReadAllBytes(filepath);
					if (imgBytes != null)
					{
						if (imgBytes != null)
						{
							string base64String = Convert.ToBase64String(imgBytes, 0, imgBytes.Length);
							string imageUrl = string.Concat("data:image/jpg;base64,", base64String);

							// Code to store into database
							// save filename and image url(base 64 string) to the database
						}
					}
				}
			}
			return Json(true);
		}
		else
		{
			return Json(false);
		}
	}
	catch (Exception)
	{
		throw;
	}
}
Also, you can store the snapshot into the database using base64string.
Screenshots:
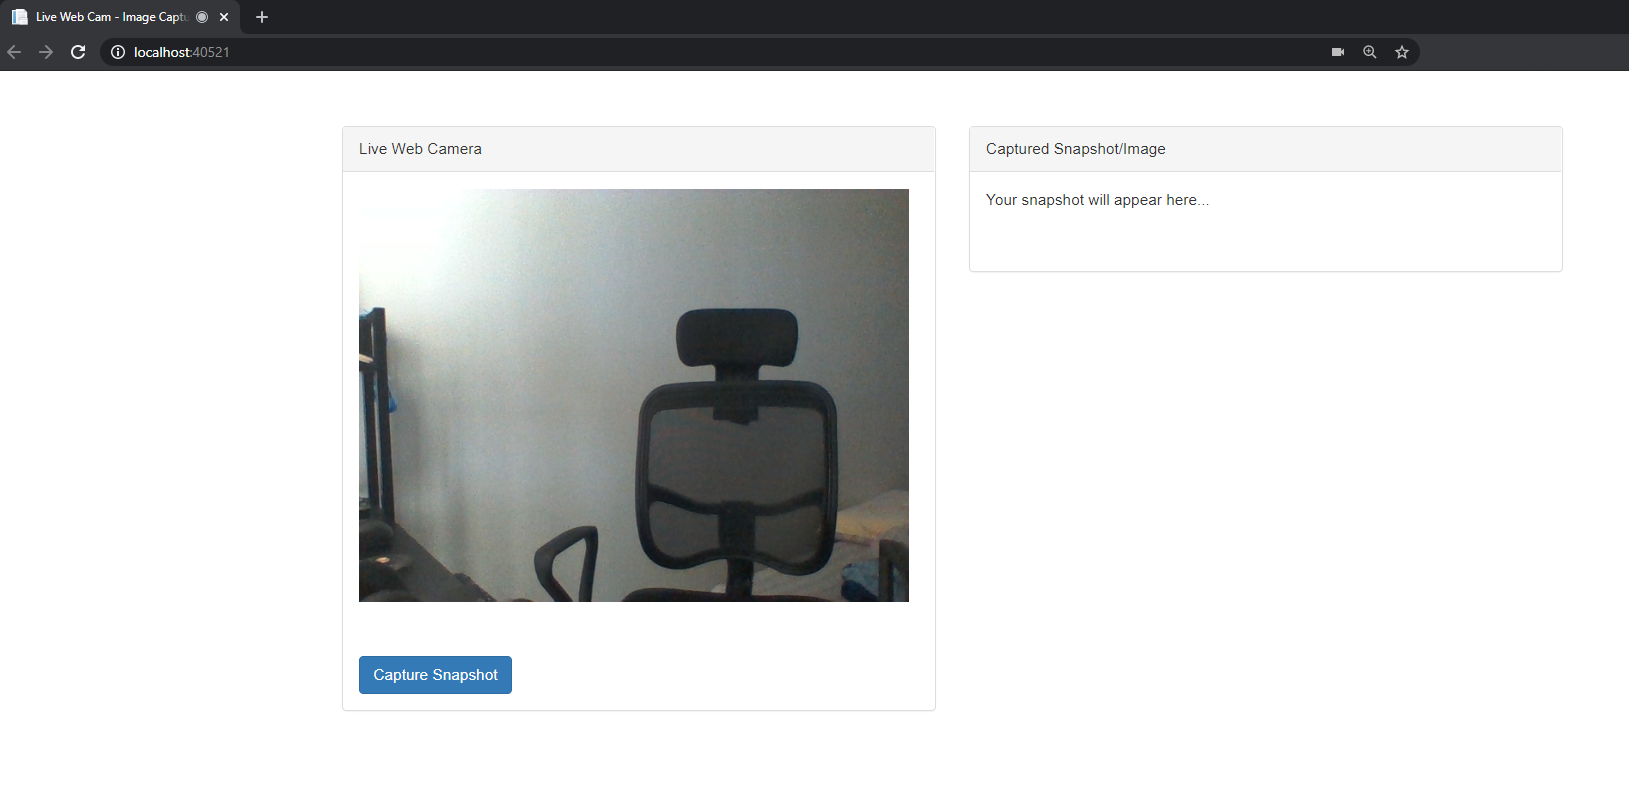
When you press F5, the browser will be launched and you will see the live video from your web camera as shown below,
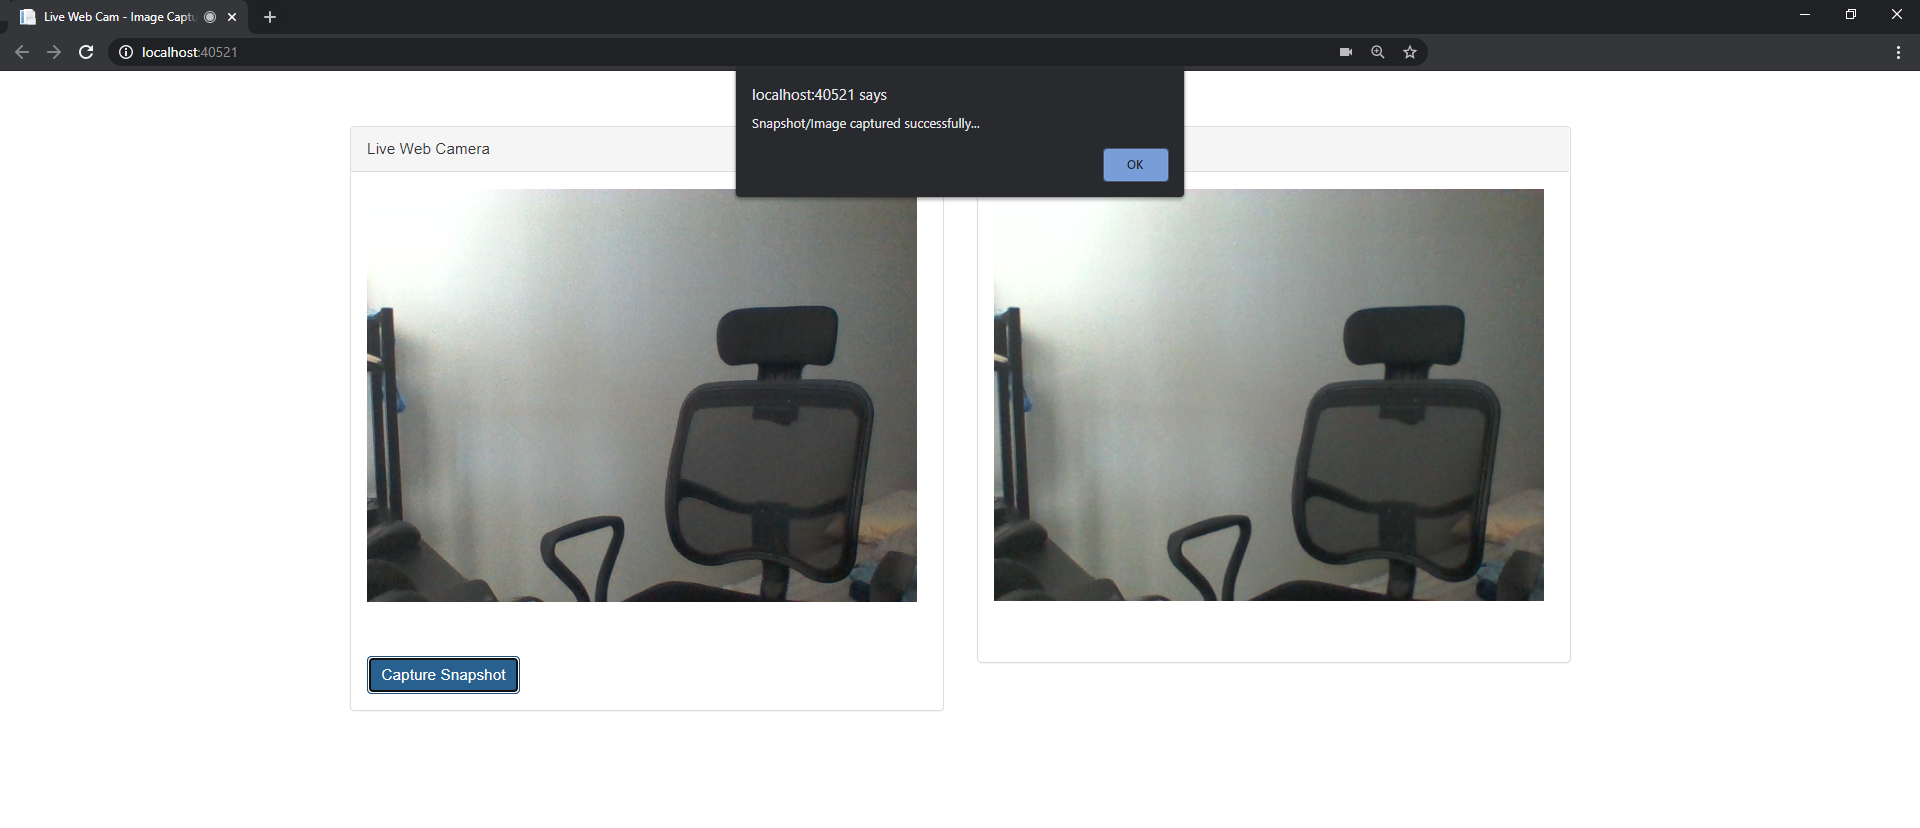
Press the "Capture Snapshot" button in the browser to capture the image from your web camera. This will also be stored in your local folder "wwwroot\Photos".
Comments (0)