
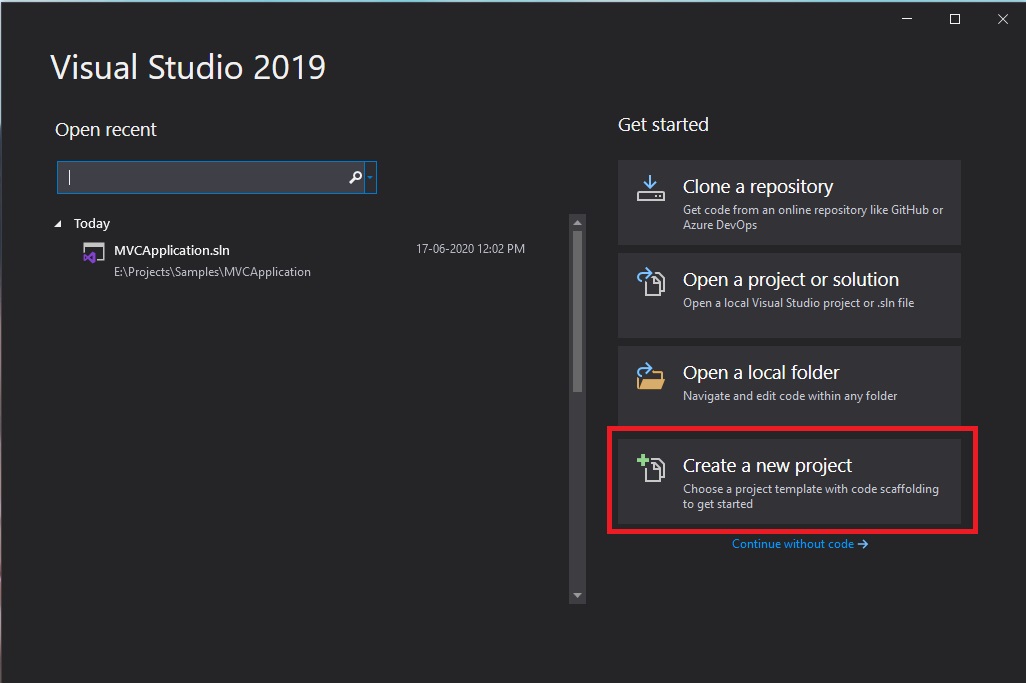
Step 1:
Open Visual Studio 2019 and click on "Create a New Project" from the Get Started section, as shown below,
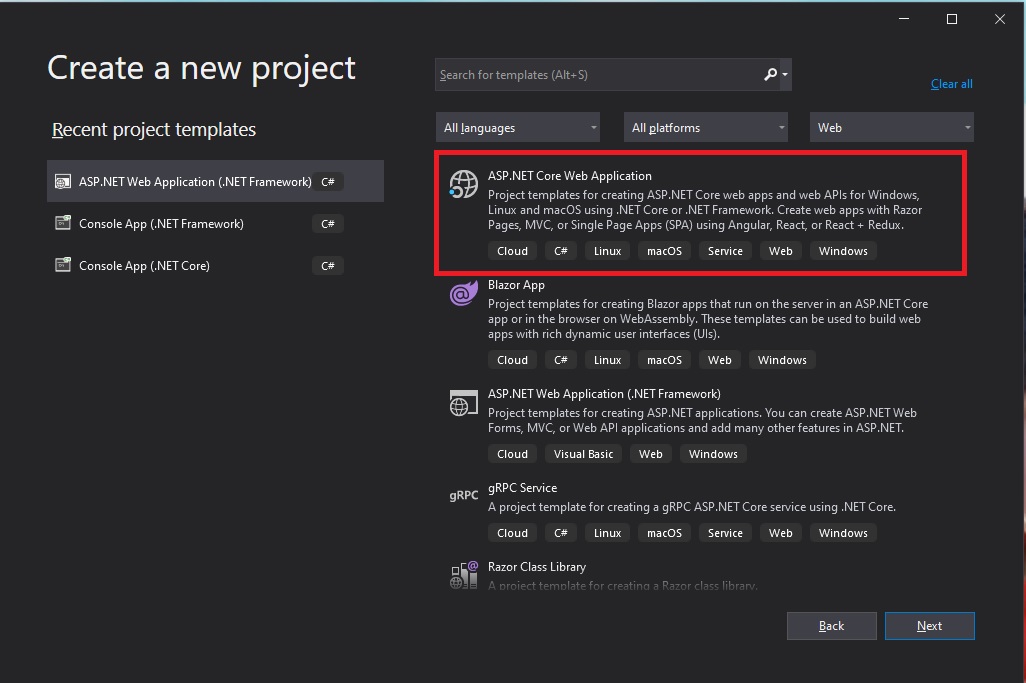
Step 2:
In the next window, you will see all the project templates. We will choose "ASP.NET Core Web Application" and Click Next, as shown below,
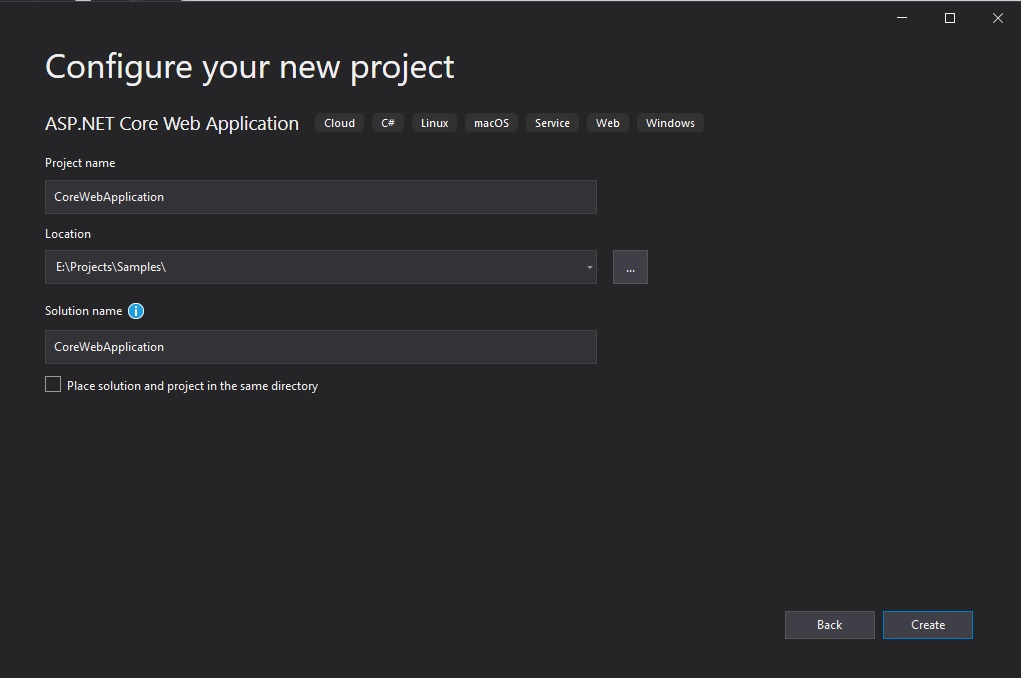
Step 3:
Provide project name, location and the solution name for Asp.Net Core Web Application and Click Create button, as shown below,
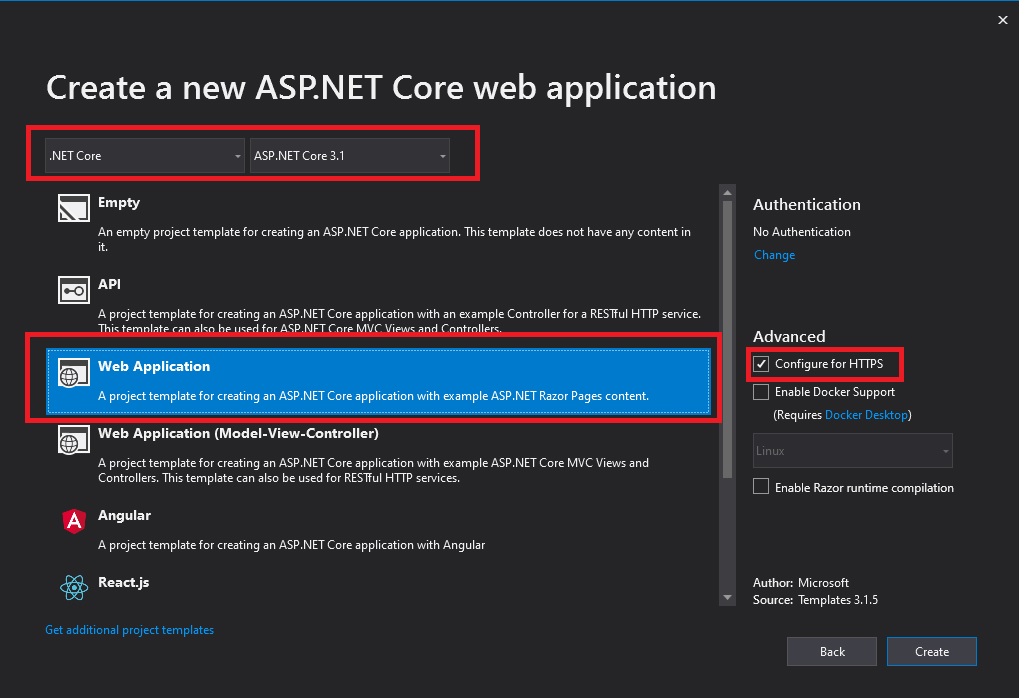
Step 4:
In the Create a new ASP.NET Core Web Application window, Select .Net Core version as "ASP.NET Core 3.1" and template as "Web Application" and select "Configure for HTTPS" under Advanced section and Next Click Create button,
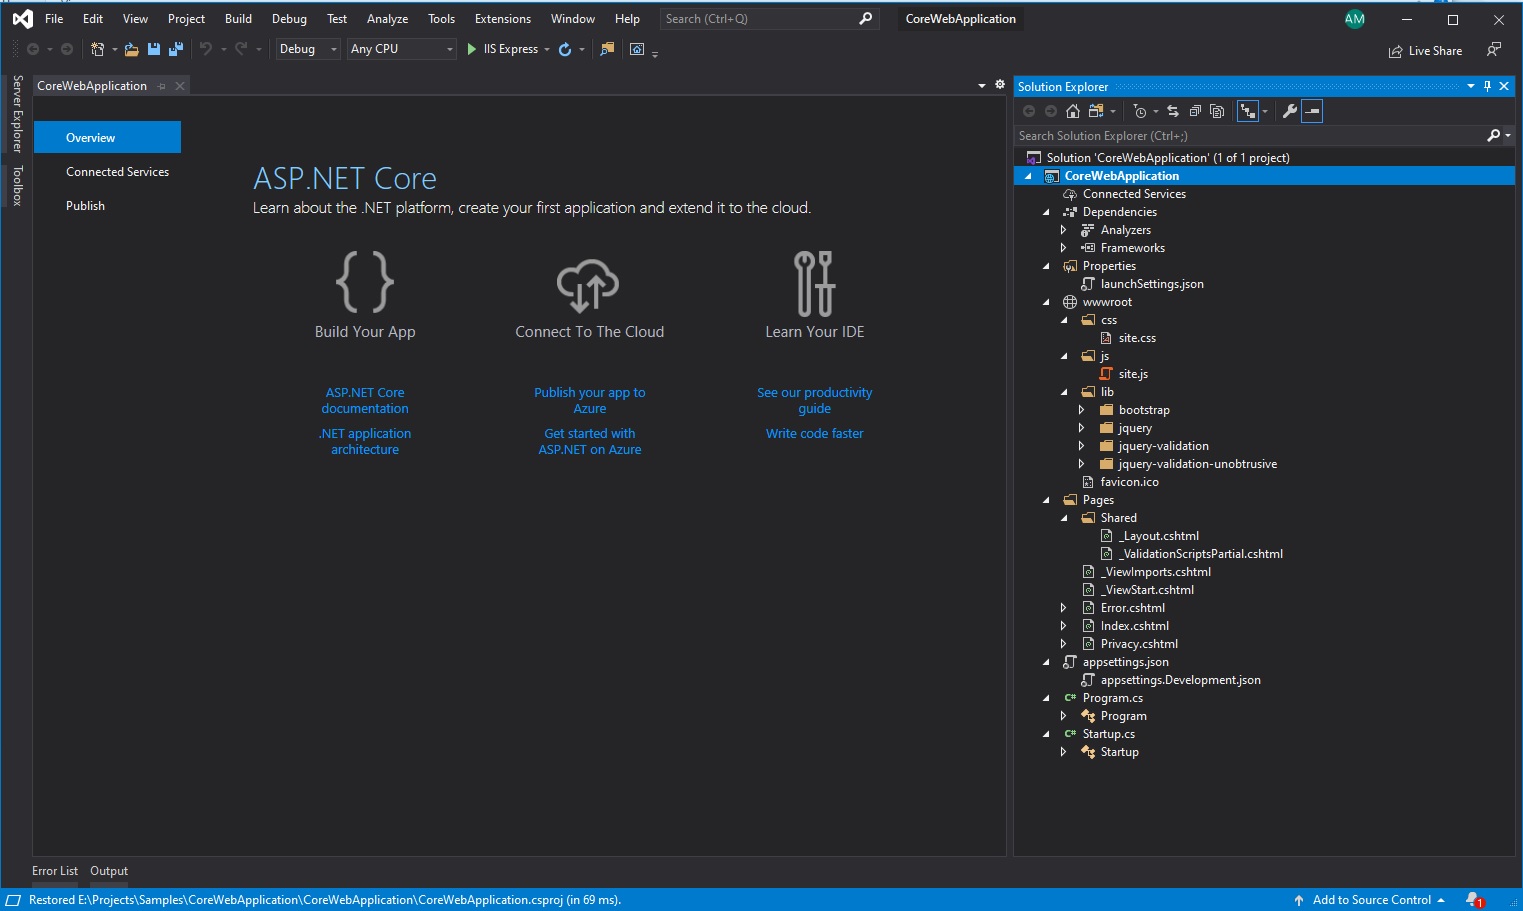
Step 5:
Once the ASP.NET Core Web Application is created, then you will see the solution and project in "Solution Explorer" as shown below,
This will include dependencies, references, and predefined templates like controllers, views, libraries, CSS, and script files.
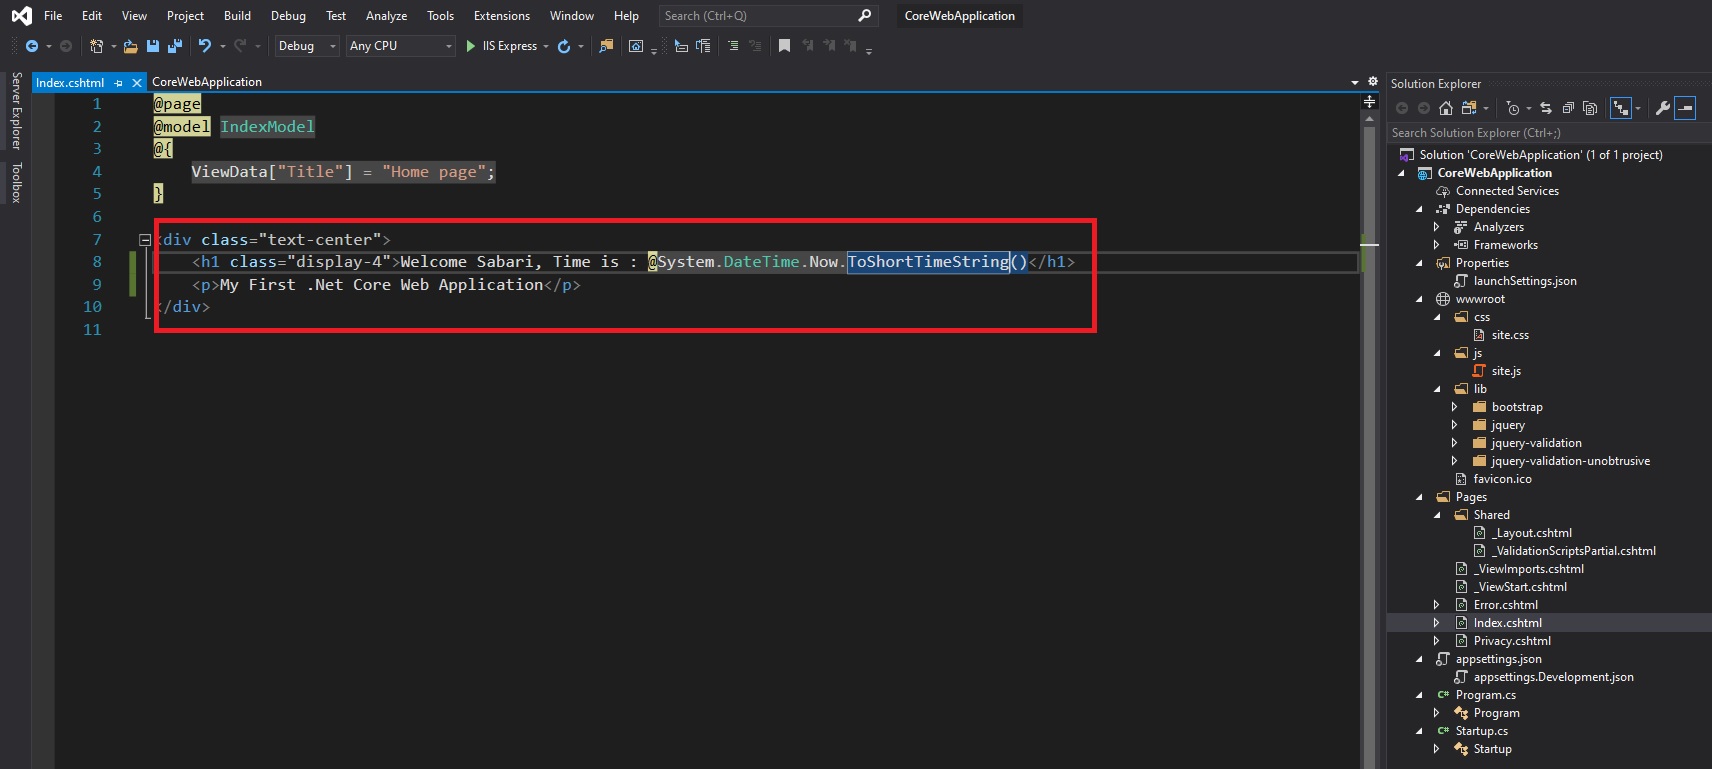
Step 6:
Just have added below code to display name and time, for example, to show and Run "IIS Express" or Press F5 to run the application,
@page
@model IndexModel
@{
    ViewData["Title"] = "Home page";
}

<div class="text-center">
    <h1 class="display-4">Welcome Sabari, Time is : @System.DateTime.Now.ToShortTimeString()</h1>
    <p>My First .Net Core Web Application</p>
</div>
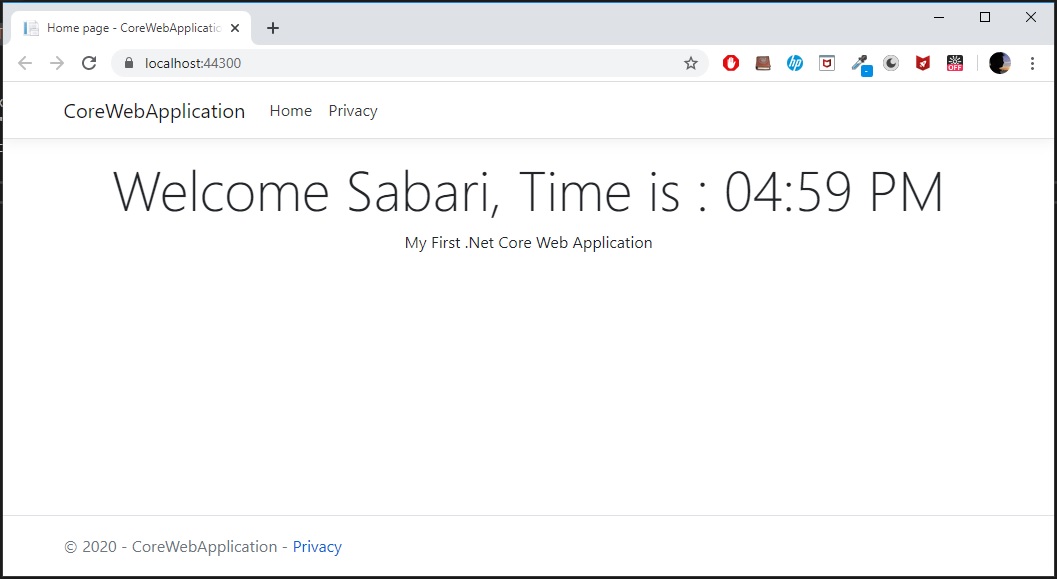
Step 7:
Once the application ran successfully, the browser will open as shown below, and verify your updated details are displayed over there.
Comments (0)