
This article explains how to insert/create, retrieve, update and delete records in AWS DynamoDB Using the ASP.NET Core Web API application.
Prerequisites:
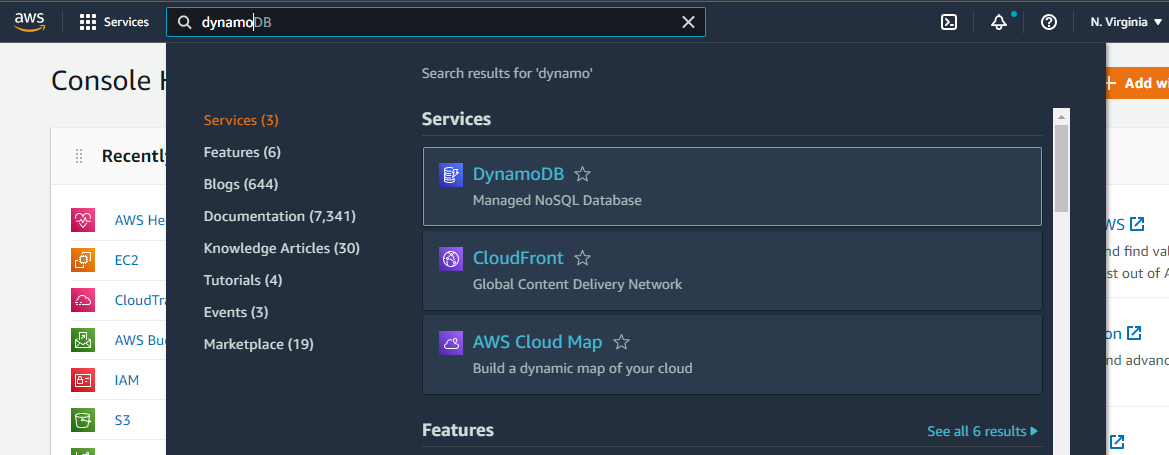
Step 1: Create a DynamoDB Table
First, we have to create a DynamoDB table. Search "DynamoDB" in the search box and click the "DynamoDB" menu as shown below,
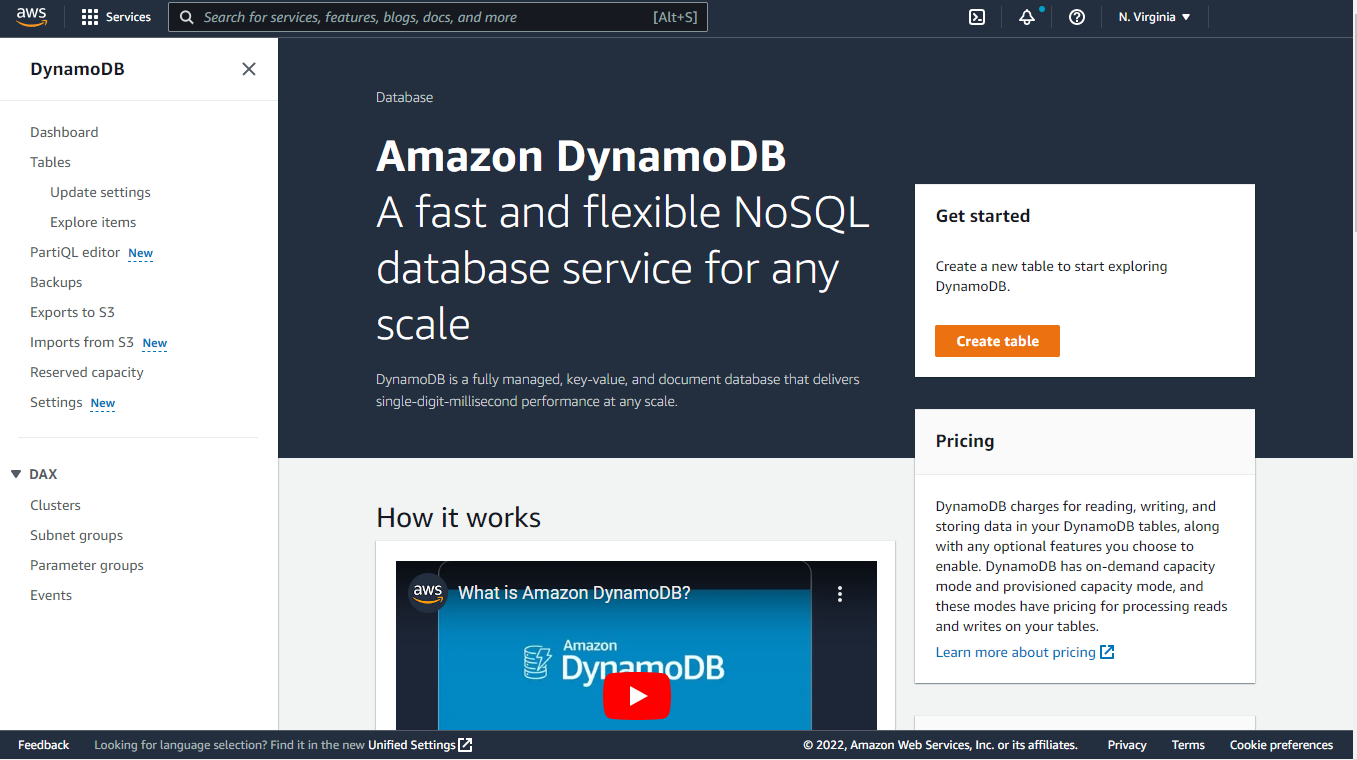
Click the "Create table" button to create the table in DynamoDB.
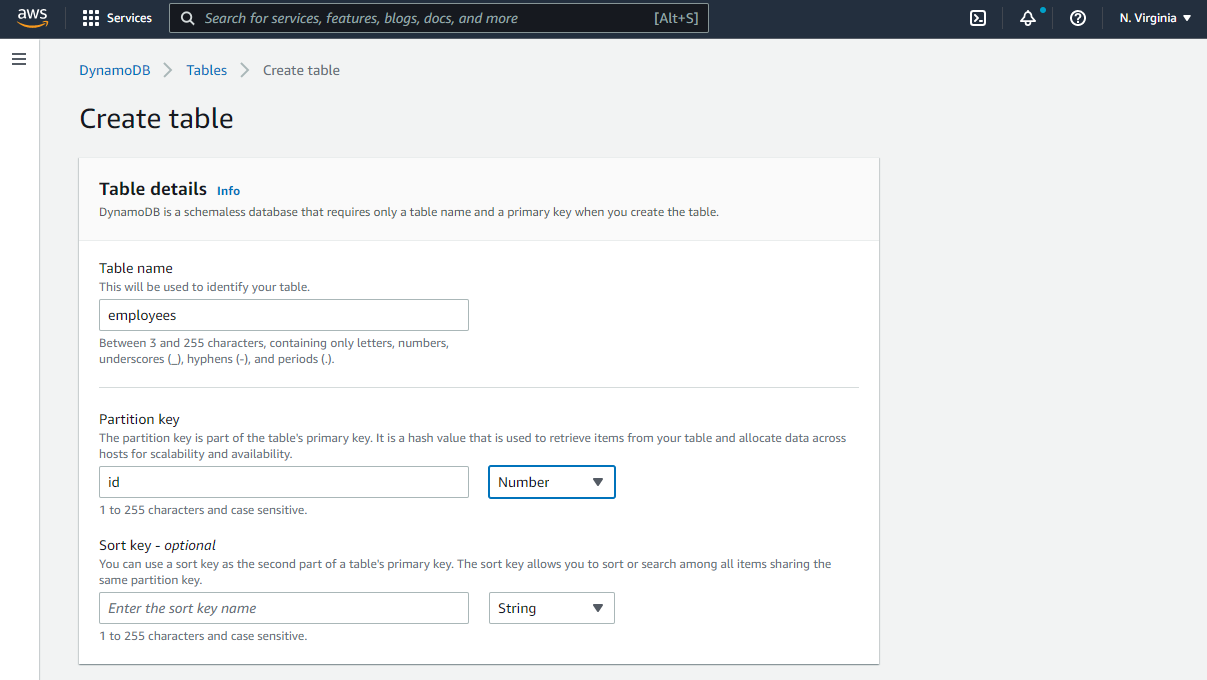
Enter the "Table name" as "employees", and "Partition Key" as "id" in the create table screen as shown below and click "Create".
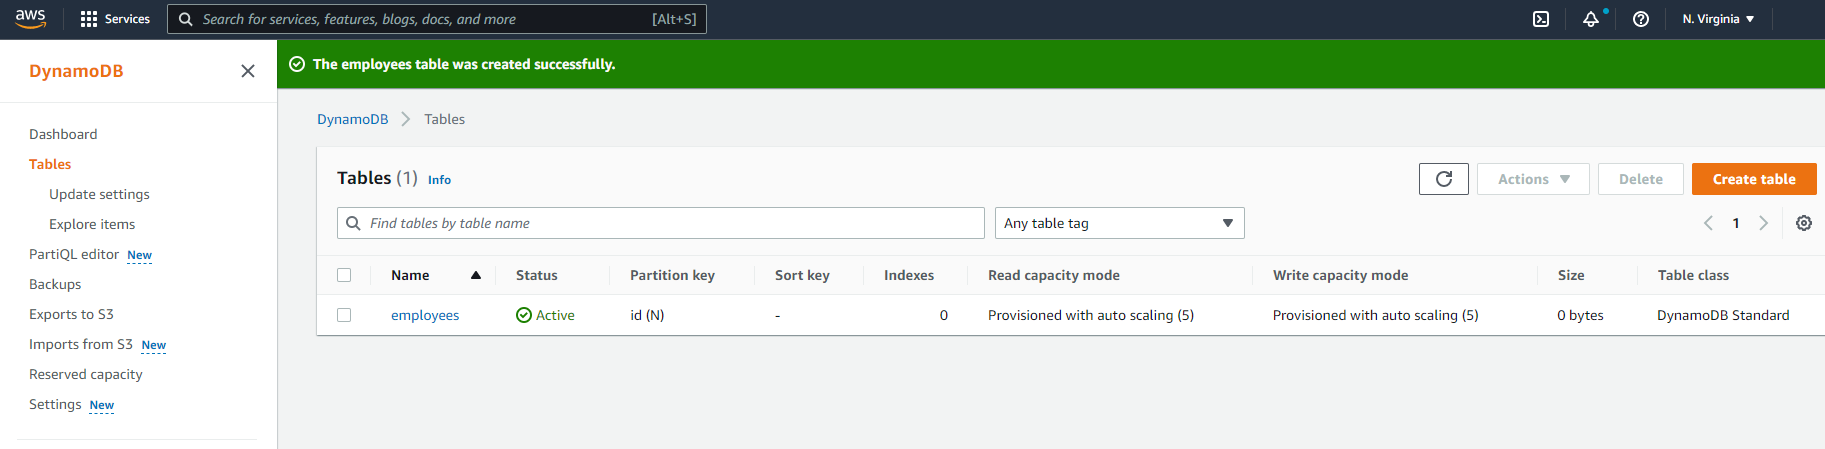
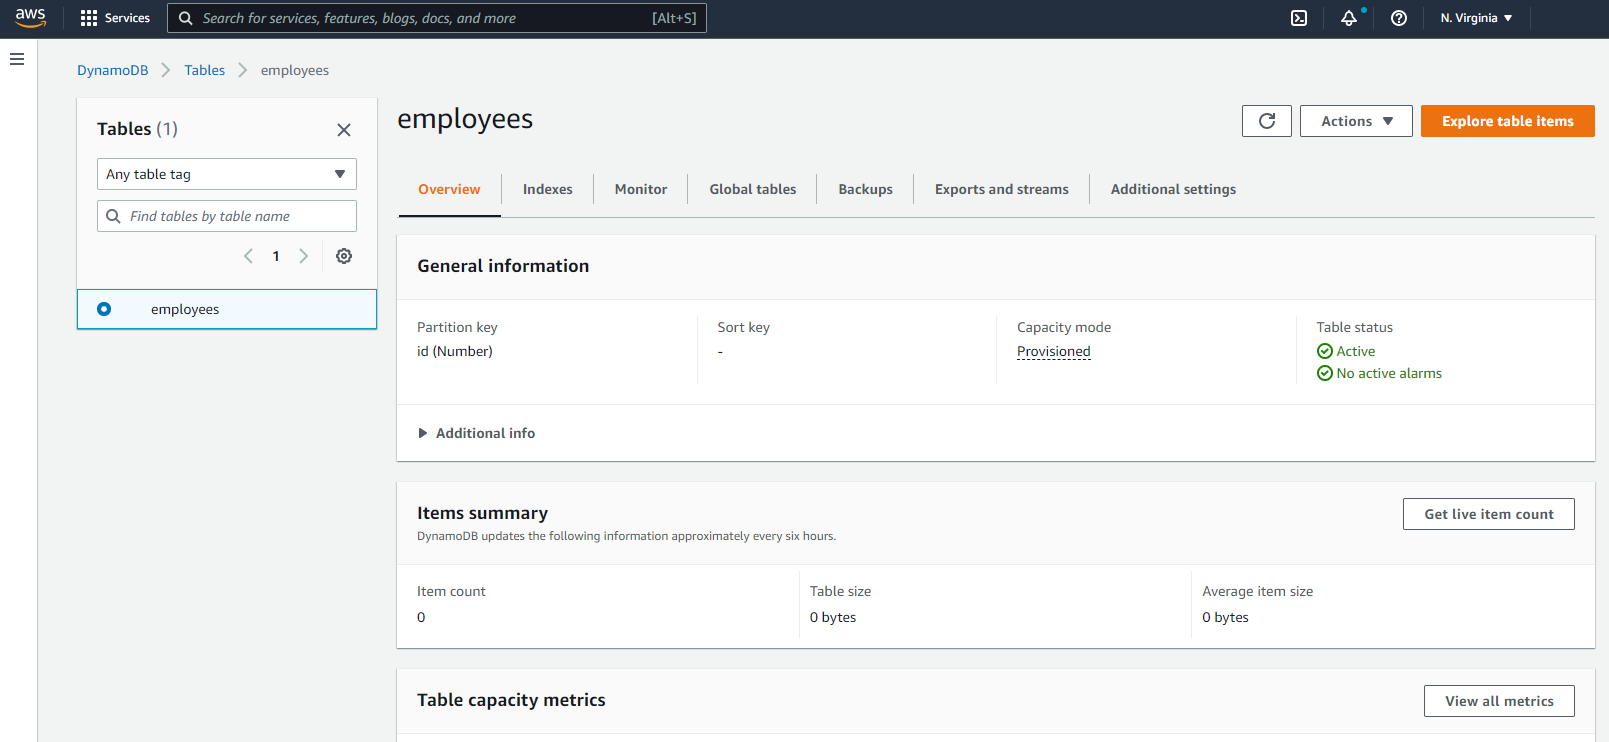
Once the table is created successfully, you will see the success message and can see the newly created table "employees" under the "Tables" grid as shown below,
Step 2: Insert Records in a Table
Next, we will have to insert some records into the "employees" table.
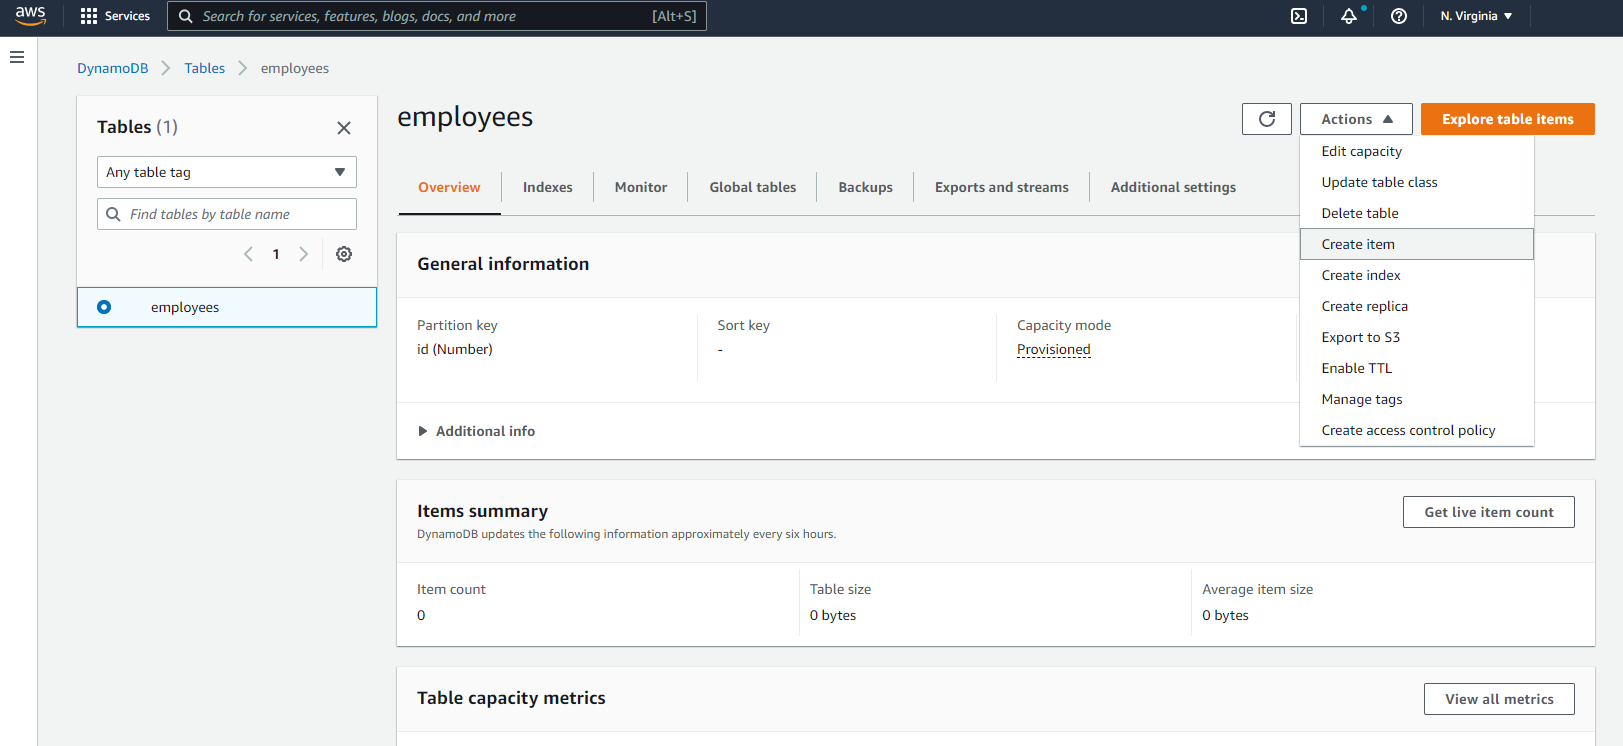
Open the "employees" table and find the dropdown called "Action".
Click "Actions" dropdown and select "Create item" option as shown below,
Now, we can enter the "Attribute name" and "Value",
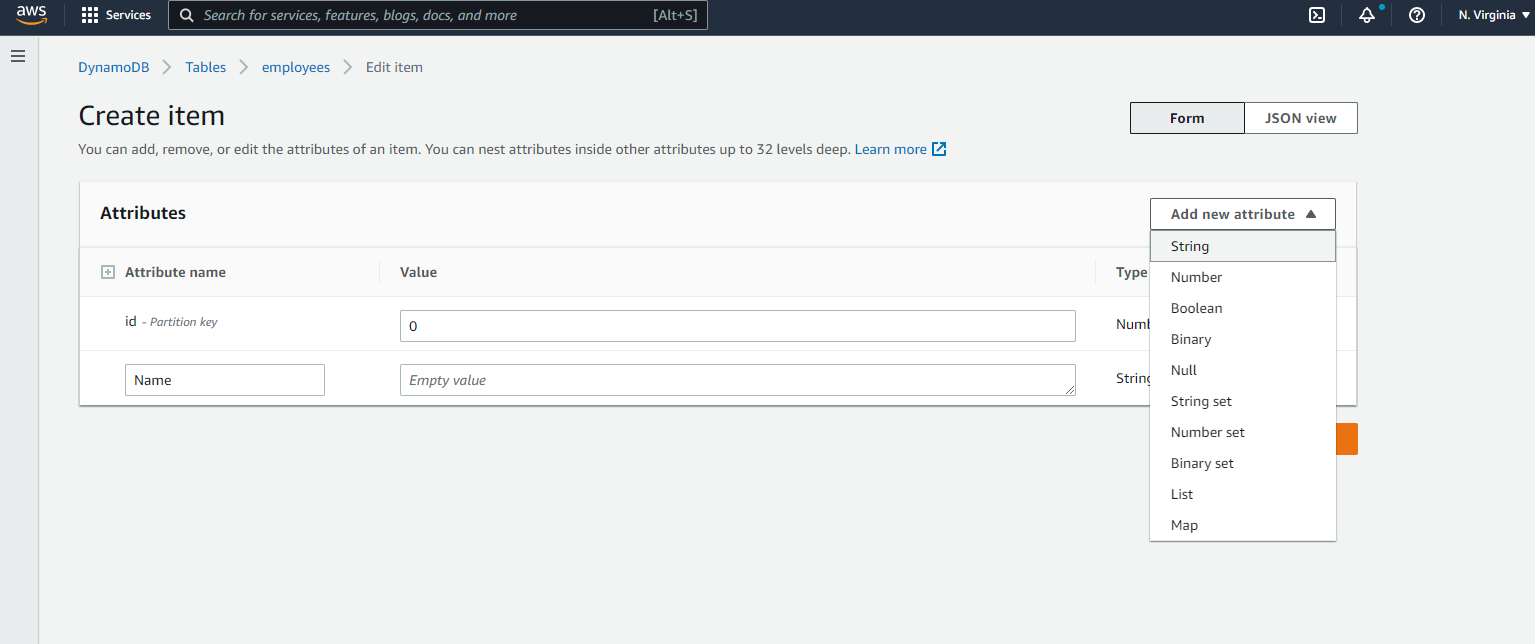
Add/Insert "Attributes" in the Form view as shown below,

We can switch it to JSON view, it will be easy for us to add the attributes in JSON view compared to the Form view.
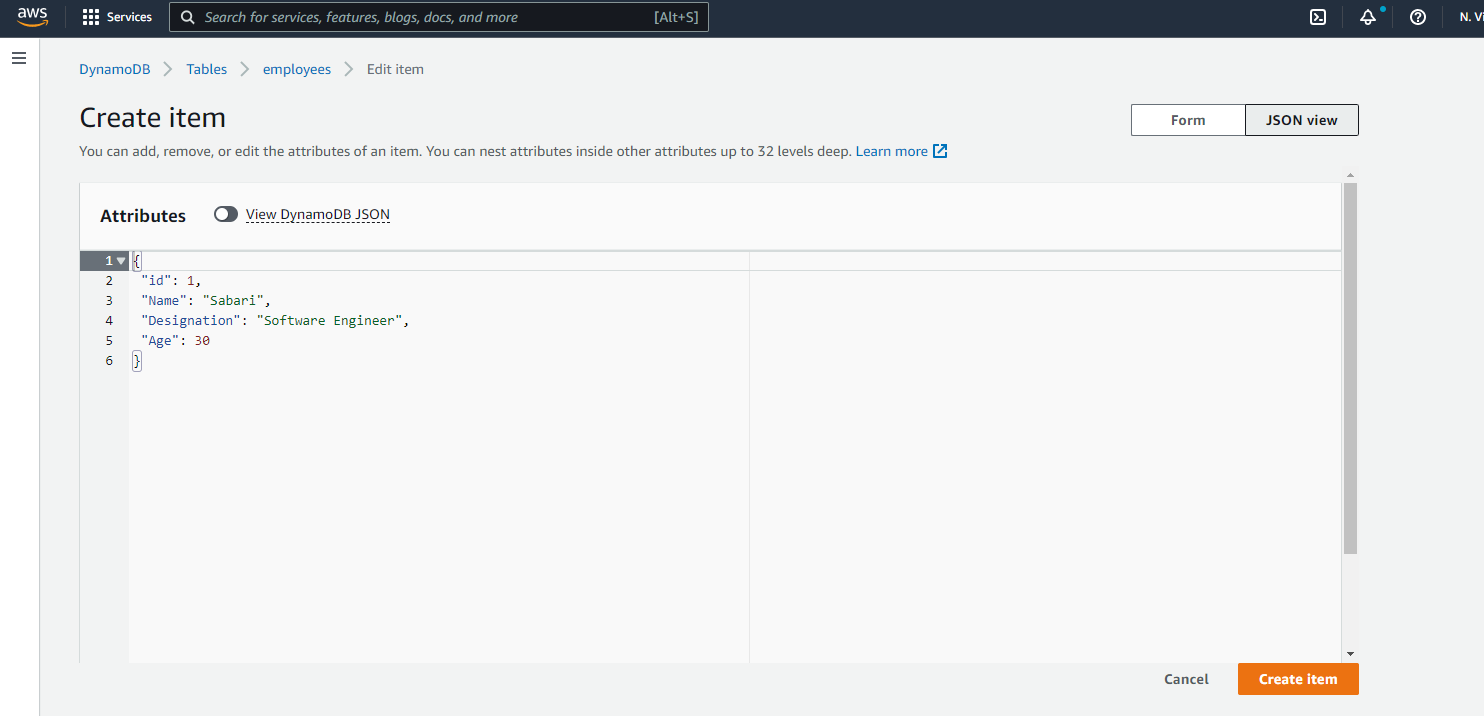
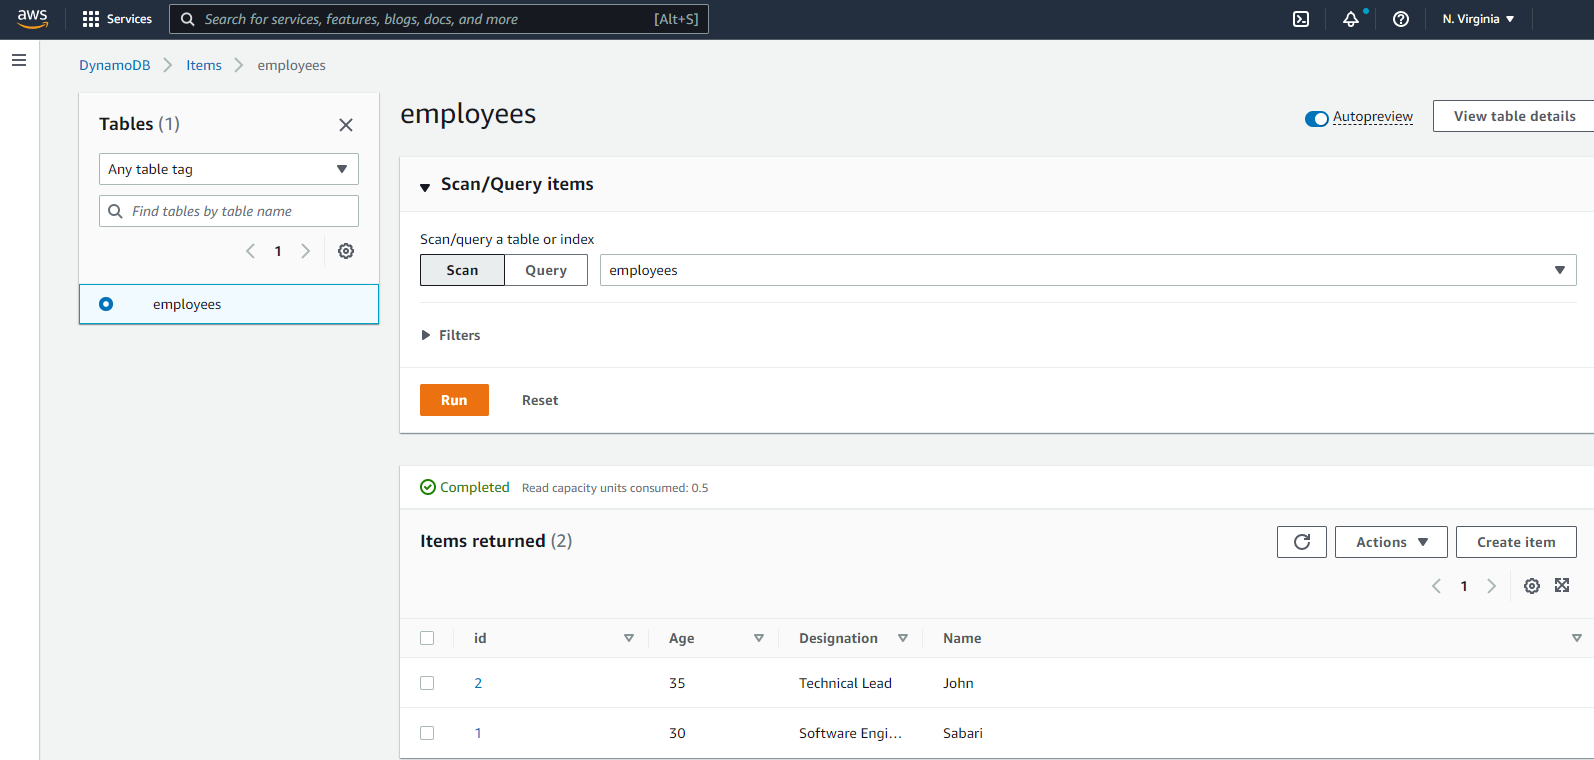
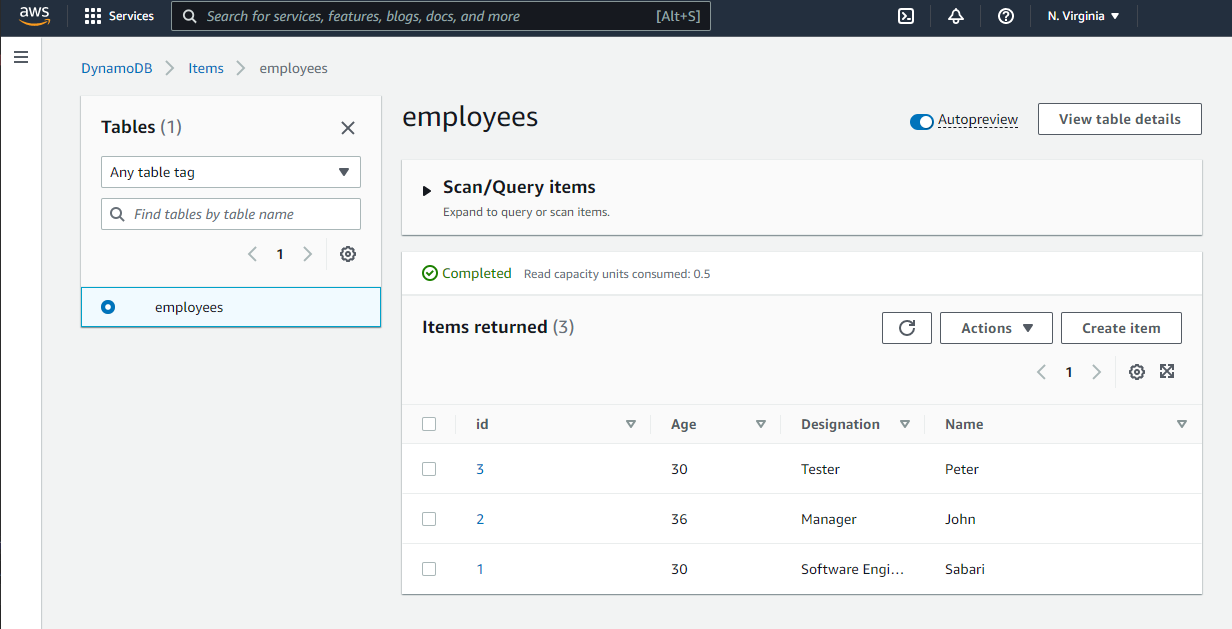
Once you click the "Create item" button, the item/attributes will be inserted into the table as shown below,
Step 3: Create an IAM User, Access Key Id, and Secret Access Key
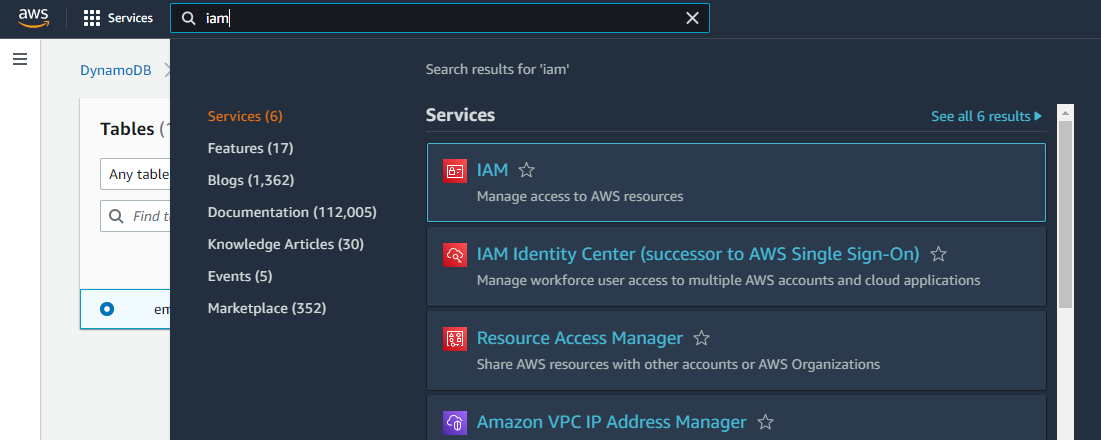
Search for "IAM" and click & open "Users" and then Select "Add Users", as shown below,
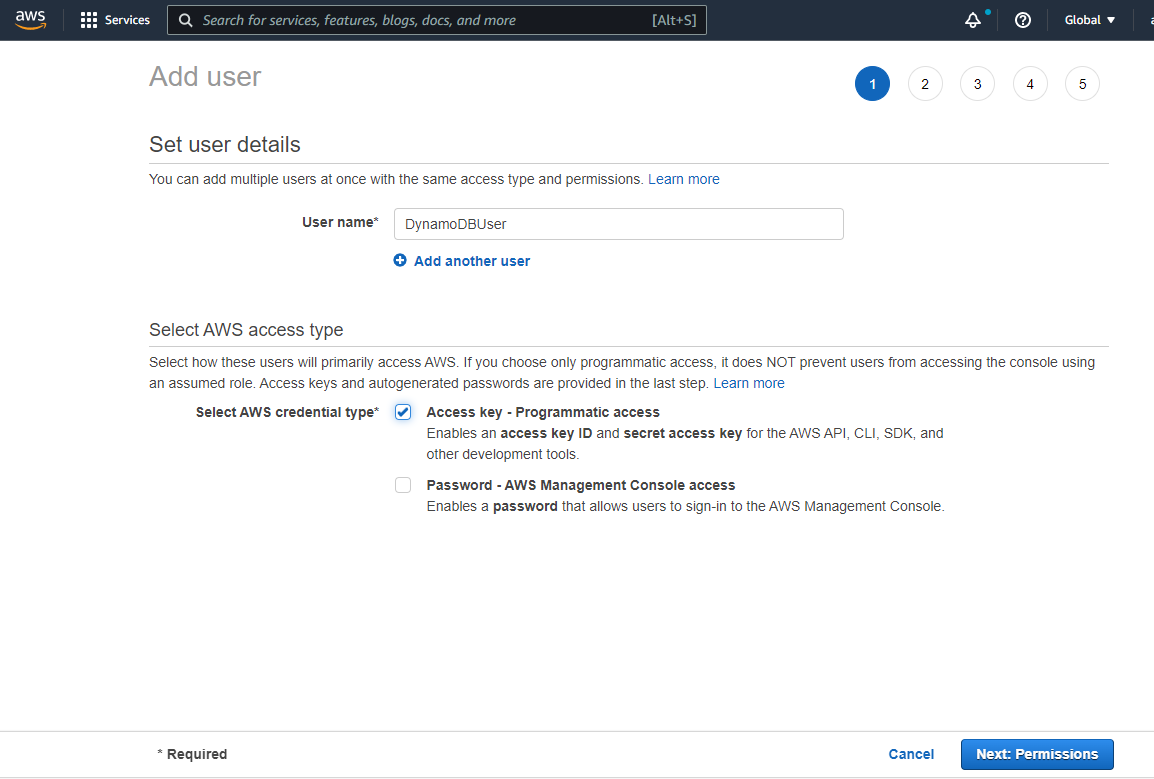
Enter "User name" and "Select AWS credential type" as "Access key - Programmatic access" (This will enable an access key Id and secret access key for the AWS API, CLI, and the development tools.) and click "Next".
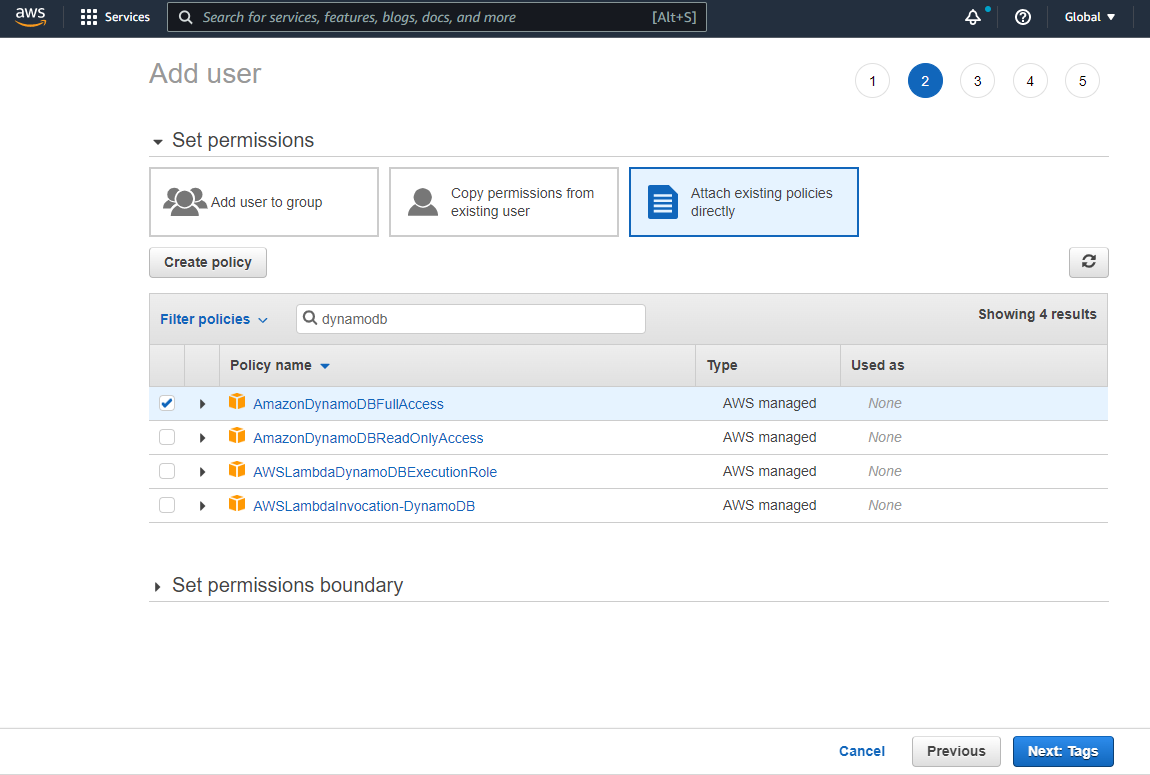
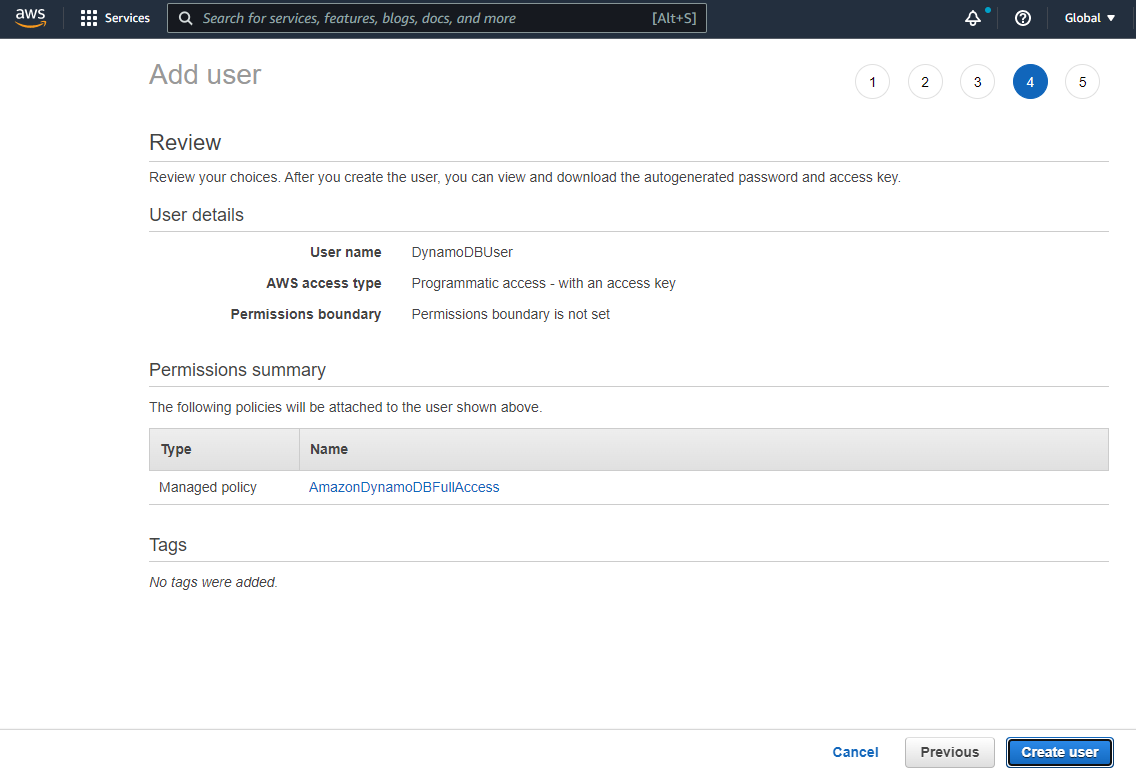
In the "Set Permissions" screen, Select "Attach existing policies directly" > Search for "dynamodb" > Select "AmazonDynamoDBFullAccess" and Click "Next" and skip "Tags".
Review the user details carefully that you have entered and click "Create User".
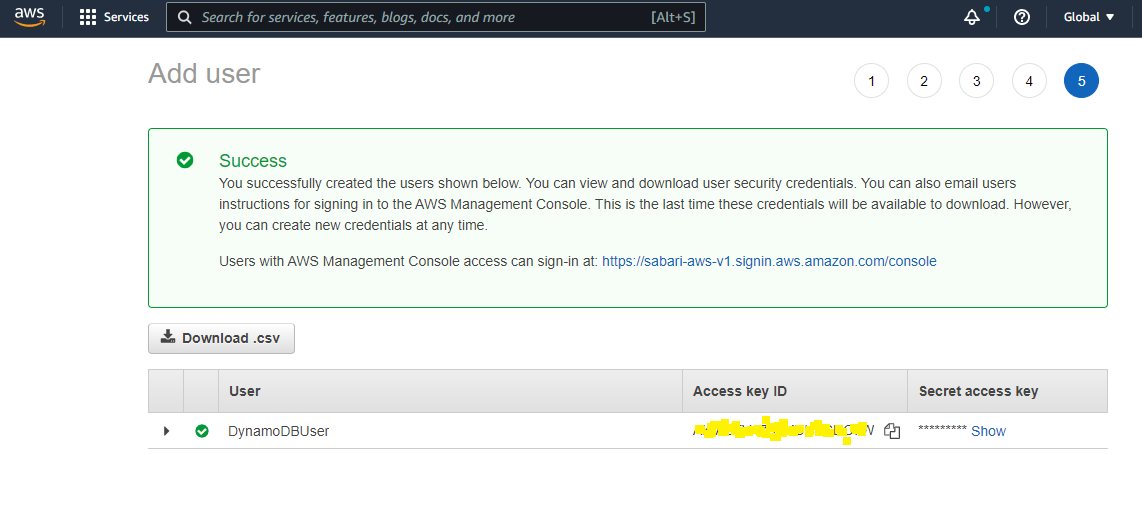
You will see the Access key ID and Secret access key once the user is created (please note both the ID and access key). then you will be redirected to the "Users" screen once you close the current screen and can see the newly created user. as shown below,
Step 4: Install AWS Command Line Interface V2
AWS CLI provides secure ways to store your credentials like secret keys. Normally, We will place the access keys within the appsettings.json of the web application, or to the secret store. But in the AWS CLI, there will be a dedicated AWS Local store that will manage your credentials and configurations.
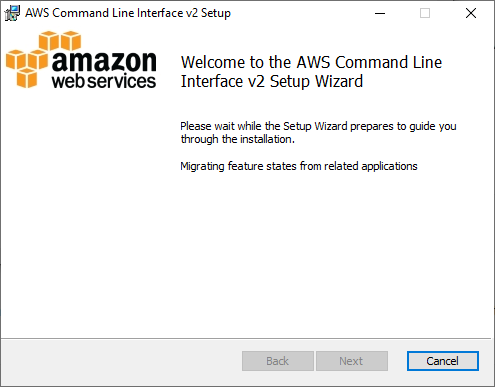
In order to use the AWS CLI, you have to first install the AWS CLI on your machine. Please download the AWS CLI here.
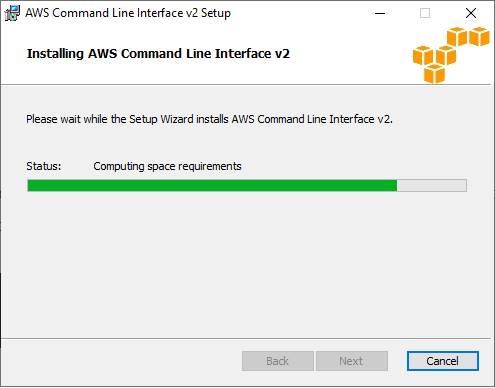
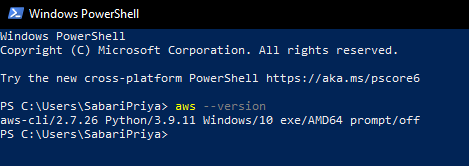
Once the AWS CLI is installed, please ensure that you restart any open command prompts / PowerShell windows.
Open a new command prompt/Powershell window and type in aws –version to check if the CLI tool has been installed correctly on your machine. If all is good, then you will see below details as shown below,
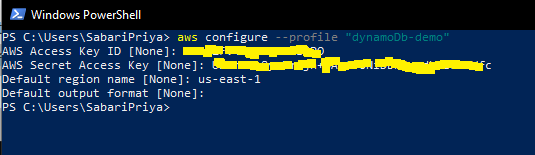
Next, we will create a new AWS Local Configuration profile, this will be used by our ASP.NET Core Web API application. In order to create a local profile, you have to use the below command,
aws configure --profile "profile-name"
Let's create a new AWS profile, we need to provide AWS Access Key ID, AWS Secret Access Key, Default region name, and Default output format as shown below,
Note:
- AWS Access Key ID and AWS Secret Access Key - You have already noted these details after the user is created
- Default region name - You have to use the same region name where your DynamoDB table is created.
- Default output format - Leave it blank
Step 5: Create a new ASP.NET Core Web API Project
Next, we will create a new ASP.NET Core Web Api project to insert, retrieve, update and delete records from AWS DynamoDB.
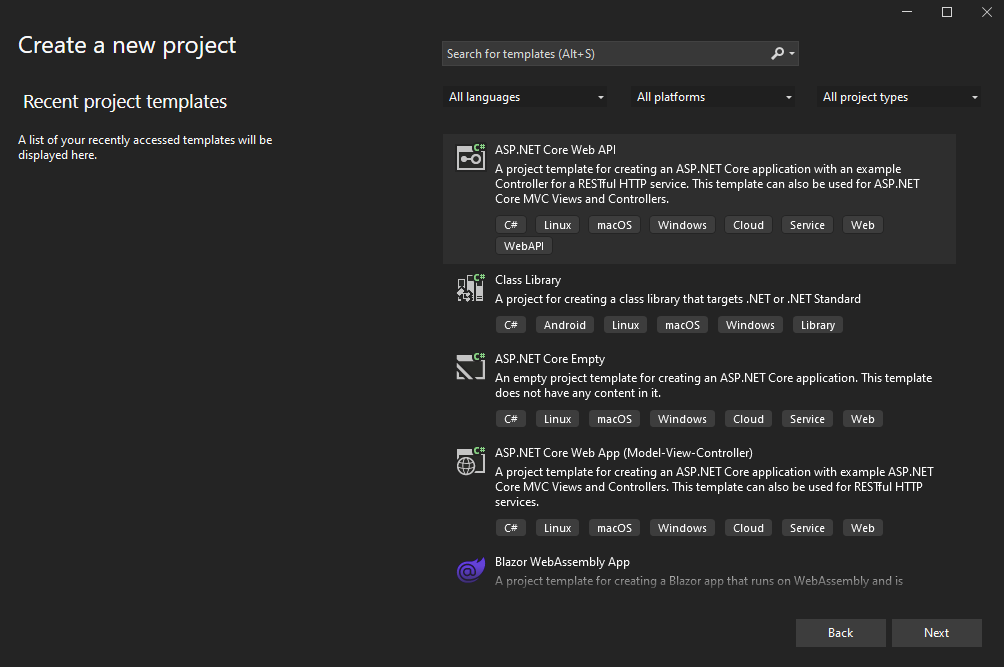
To create a new ASP.NET Core WEB API, Open Visual Studio 2019 or newer -> Create a new project -> Select "ASP.NET Core Web API" as shown below,
In the next step, provide the project name as "CRUDDynamoDBProject" and select the location.
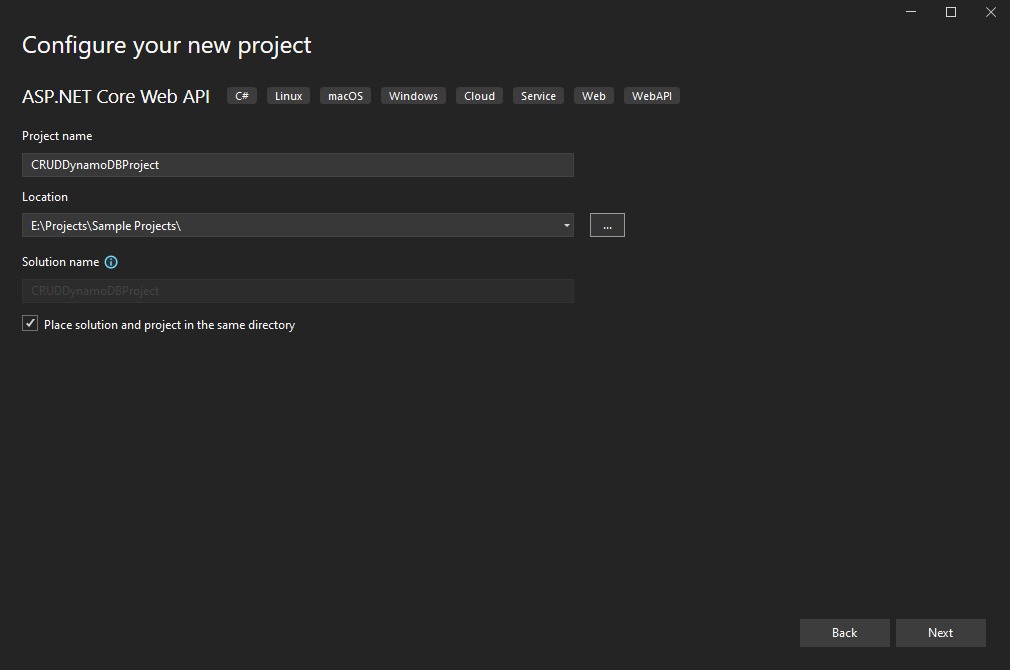
Next, choose .NET Core 6.0 and Click "Create".

Step 6: Install AWSSDK.DynamoDBv2 and AWSSDK.Extensions.NETCore.Setup Packages
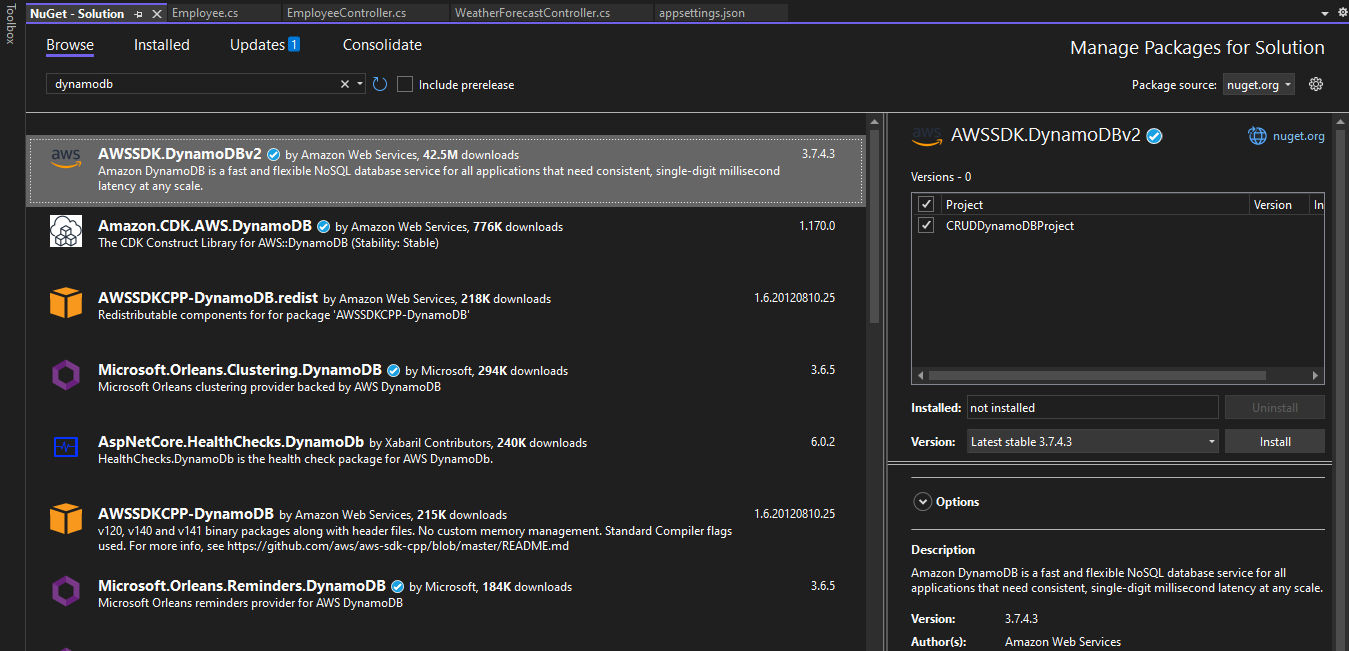
Next, you will need to install AWSSDK.DynamoDBv2 Package via NuGet package manager as shown below,
Open "Tools" -> "NuGet Package Manager" -> "Manage NuGet Packages for Soultions" and Search "dynamodb" -> Select "AWSSDK.DynamoDBv2" and install.
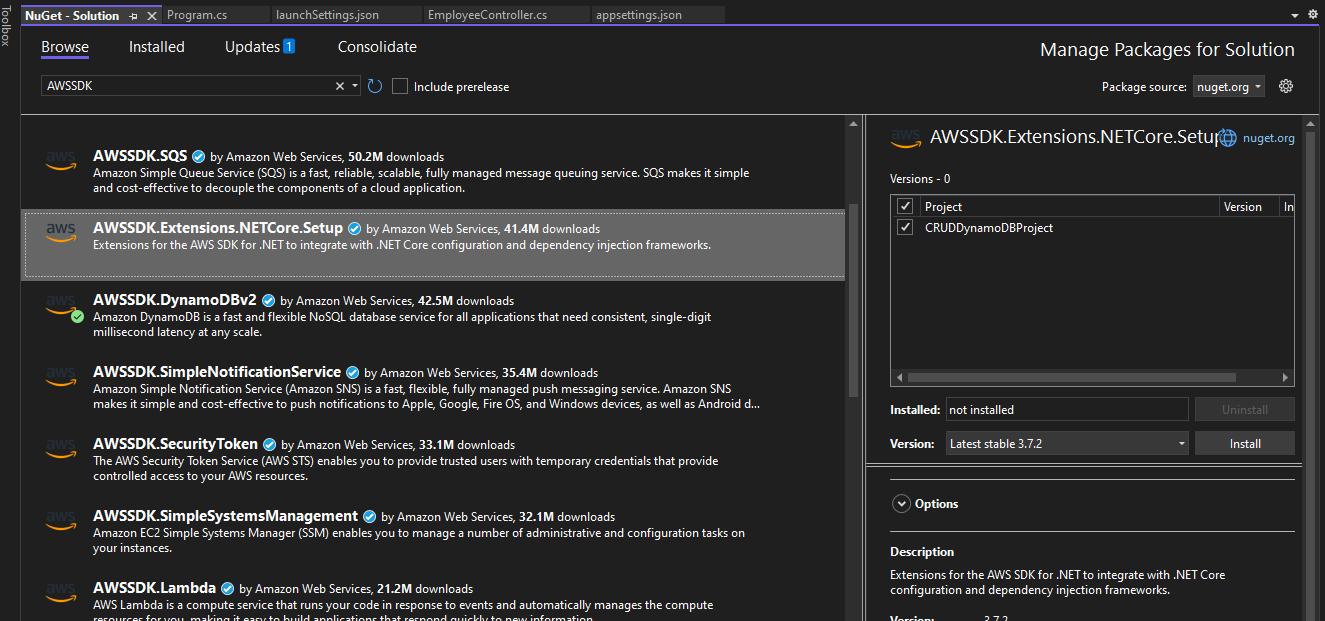
Once the above package is installed, Search "awssdk" -> Select "AWSSDK.Extensions.NETCore.Setup" and install.
Step 7: Add a Model and Controller
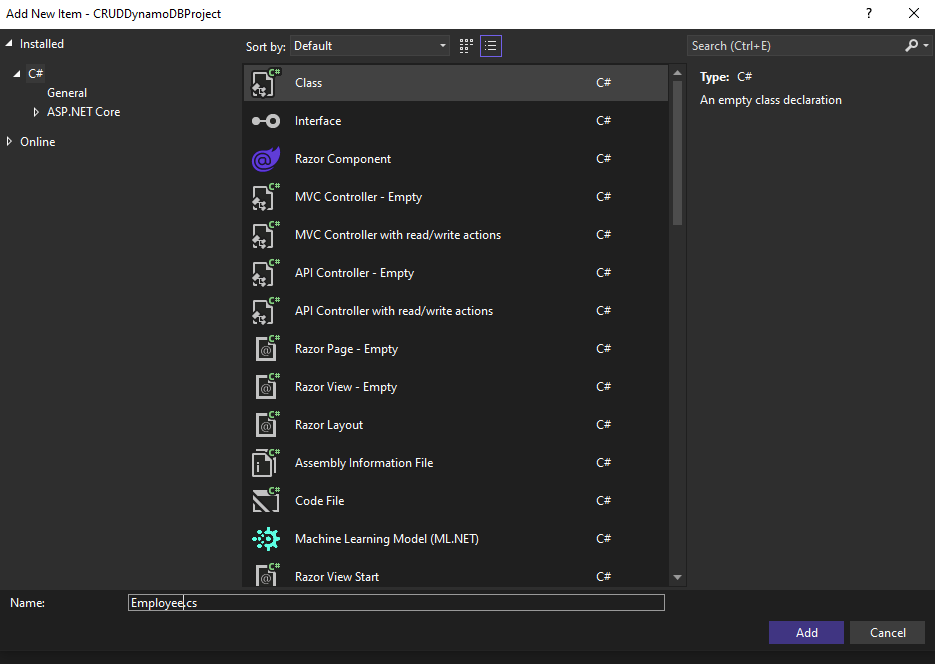
Next, we will create a class named "Employee",
Add the below properties to the class file,
using Amazon.DynamoDBv2.DataModel;
namespace DynamoStudentManager.Models
{
    [DynamoDBTable("employees")]
    public class Employee
    {
        [DynamoDBHashKey("id")]
        public int? Id { get; set; }
        [DynamoDBProperty("Name")]
        public string? Name { get; set; }
        [DynamoDBProperty("Designation")]
        public string? Designation { get; set; }
        [DynamoDBProperty("Age")]
        public int Age { get; set; }
    }
}
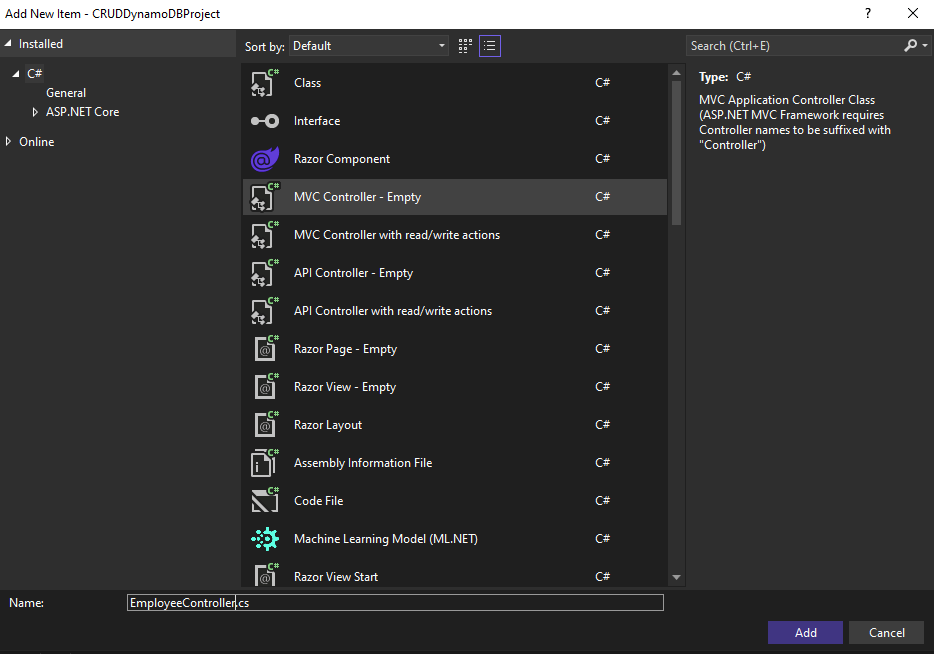
Next, create a controller named "EmployeeController" as shown below,
And add the below code to the controller,
using Amazon.DynamoDBv2.DataModel;
using DynamoStudentManager.Models;
using Microsoft.AspNetCore.Mvc;

namespace CRUDDynamoDBProject.Controllers
{
    [Route("api/[controller]")]
    public class EmployeeController : Controller
    {
        private readonly IDynamoDBContext _context;
        public EmployeeController(IDynamoDBContext context)
        {
            _context = context;
        }

        [HttpGet("{employeeId}")]
        public async Task<IActionResult> GetByEmployeeId(int employeeId)
        {
            var employee = await _context.LoadAsync<Employee>(employeeId);

            if (employee == null)
                return NotFound();

            return Ok(employee);
        }

        [HttpGet]
        public async Task<IActionResult> GetAllEmployees()
        {
            var employee = await _context.ScanAsync<Employee>(default).GetRemainingAsync();
            return Ok(employee);
        }

        [HttpPost]
        public async Task<IActionResult> AddEmployee([FromBody] Employee request)
        {
            var employee = await _context.LoadAsync<Employee>(request.Id);

            if (employee != null)
                return BadRequest($"Employee Already Exists");

            await _context.SaveAsync(request);
            return Ok(request);
        }

        [HttpPut]
        public async Task<IActionResult> UpdateEmployee([FromBody] Employee request)
        {
            var employee = await _context.LoadAsync<Employee>(request.Id);

            if (employee == null)
                return NotFound();

            await _context.SaveAsync(request);
            return Ok(request);
        }

        [HttpDelete("{employeeId}")]
        public async Task<IActionResult> DeleteEmployee(int employeeId)
        {
            var employee = await _context.LoadAsync<Employee>(employeeId);

            if (employee == null)
                return NotFound();

            await _context.DeleteAsync(employee);
            return NoContent();
        }
    }
}
Step 8: Configure AWS Credentials
Add the "AWS " section including the profile name and region in the "appsettings.json" file which we have created in Step 4.
{
  "Logging": {
    "LogLevel": {
      "Default": "Information",
      "Microsoft.AspNetCore": "Warning"
    }
  },
  "AllowedHosts": "*",
  // Add the below section for AWS
  "AWS": {
    "Profile": "dynamoDb-demo",
    "Region": "us-east-1"
  }
}
Step 9: Service Registration
Next, We will register the AWS Services and configuration within the ASP.NET Core container.
Add the below code to the "Program.cs" file.
var awsOptions = builder.Configuration.GetAWSOptions();
builder.Services.AddDefaultAWSOptions(awsOptions);
builder.Services.AddAWSService<IAmazonDynamoDB>();
builder.Services.AddScoped<IDynamoDBContext, DynamoDBContext>();
Step 10: Test the API
We are good to go to insert, update, delete and retrieve records from AWS DynamoDB using ASP.NET Core Web API via Postman.
Run the API and open the Postman tool to test the API.
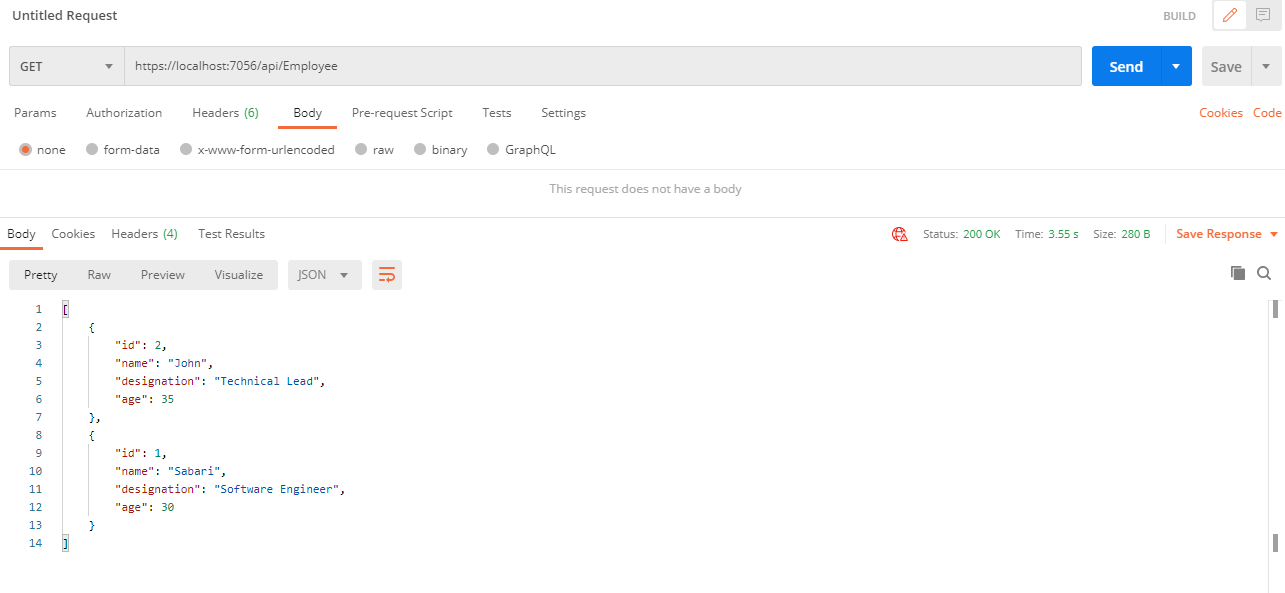
Retrieve Route Testing: [GET] Get all the records from DynamoDB
Route: '/api/Employee'
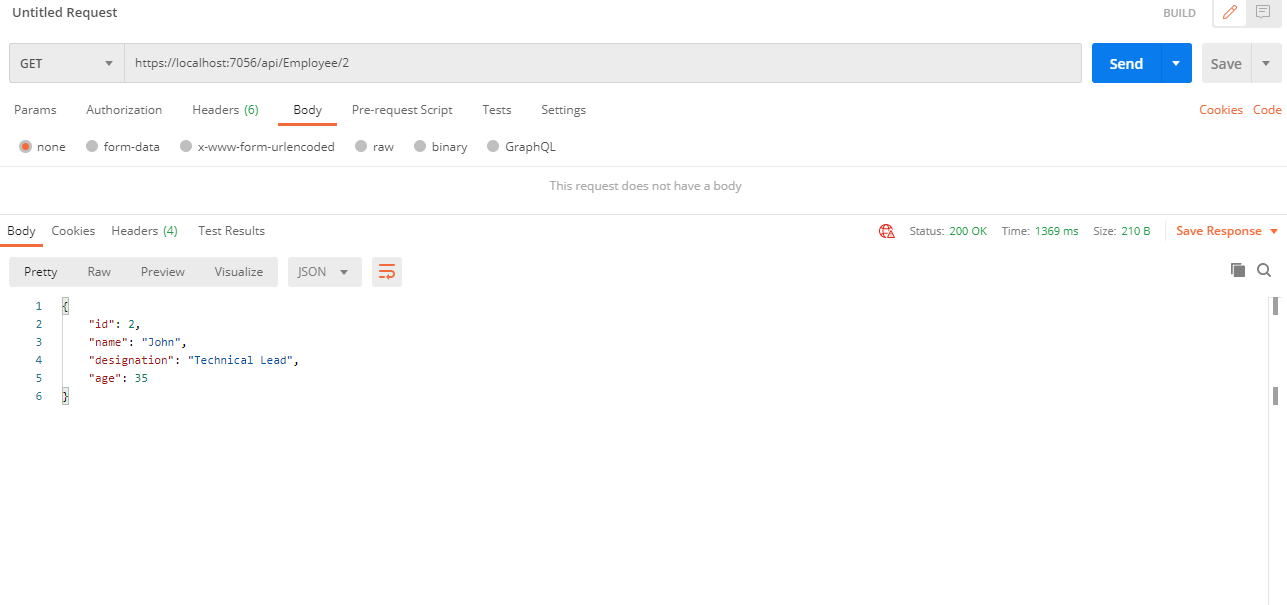
Retrieve Route Testing: [GET] Get the records using Id from DynamoDB
Route: '/api/Employee/{id}'
Create Route Testing: [POST]
Route: '/api/Employee/'
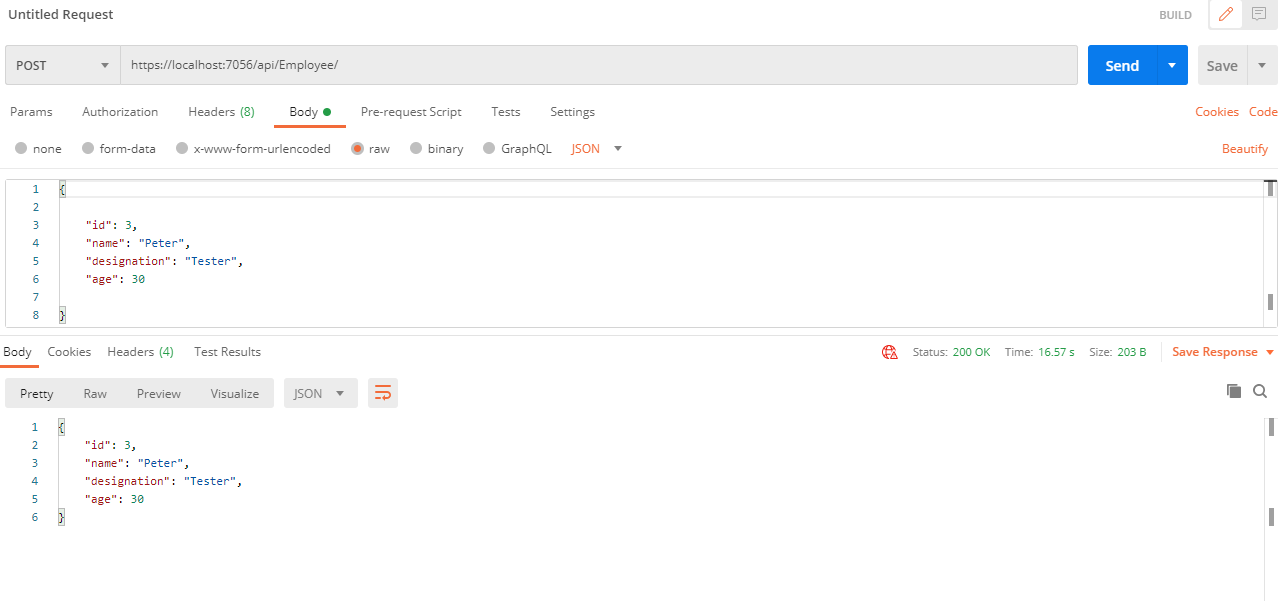
Once the request is successful, you can verify whether the record is inserted into AWS DynamoDB table as shown below,

Update Route Testing: [PUT]
Route: '/api/Employee/'
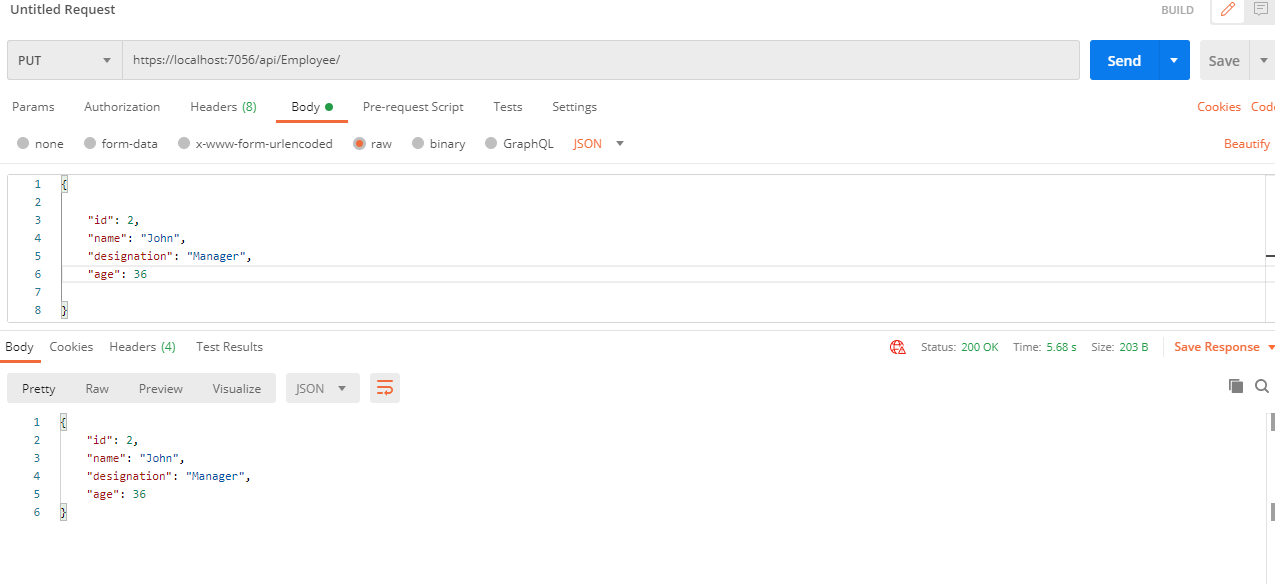
The record is successfully updated in the AWS DynamoDB table as shown below,
Delete Route Testing: [DELETE]
Route: '/api/Employee/'

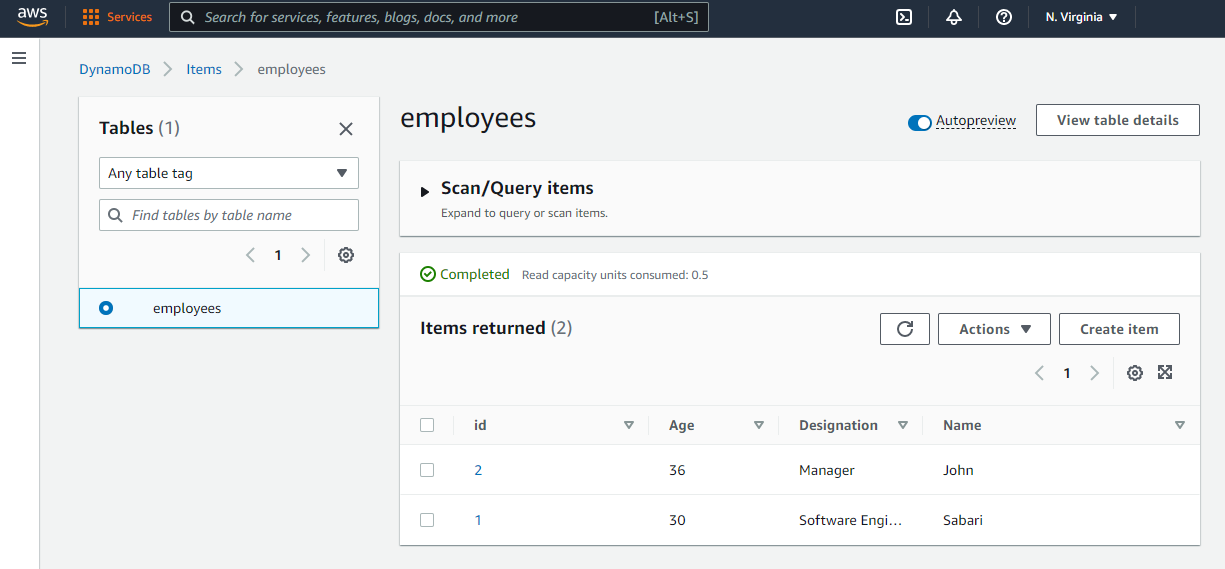
The record is successfully deleted in the AWS DynamoDB table.
Comments (0)