
Email Automation with RPA Using UiPath
Among numerous activities that UiPath can automate, Email automation is one of the most popular requirements for many employees and organizations across the globe. Using Uipath we can automate sending emails as well as receiving them. In this tutorial, we will explain all the activities and packages that UiPath offers for Email automation.
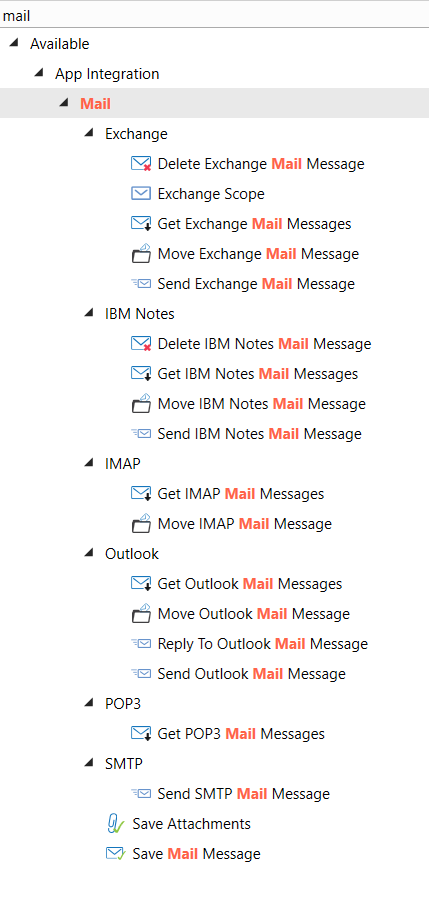
Simply searching for mail in the Activities Panel gives out all the required activities and opportunities that UiPath provides.
- SMTP – It is short for Simple Mail Transfer Protocol and is a basic protocol that only allows sending messages
- POP3 – It stands for Post Office Protocol and is an older version of a protocol for reading messages. Although this protocol is almost obsolete, most mail servers supports it.
- IMAP - Internet Message Access Protocol only helps to receive messages and also provides additional features such as “Read” and “Move” emails between folders.
- Exchange - This is a Microsoft Enterprise email solution which is integrated within UiPath flawlessly and allows the user to perform multiple actions such as Send, Delete, Move, and Get Email messages.
- Outlook – This activity uses the API of the desktop application and hence does not require to set up users, servers, or other advanced details. This activity integrates Outlook API such that UiPath can use the already logged-in Outlook account.
- IBM Notes – This uses the IBM notes desktop API to interact with the application and perform send, receive, move, and reading activities. Similar to Outlook, this does not require the user to set up servers, users, and works with the logged-in account.
- Save Mail Message – Saves Emails on local disk
- Save Attachments – Downloads attachments and saves them to local disk
Checking Emails
- There are four activities in UiPath that allow checking received Emails which include Get IMAP mail messages, Get POP3 Mail Messages, Get Outlook Mail Messages, And Get Exchange Mail Messages, and Finally Get IBM Notes Mail Messages.
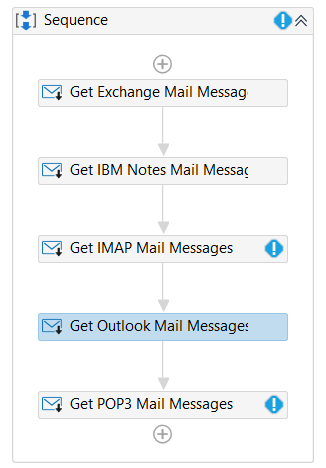
- All of them provide the same functionality of receiving or providing email messages but each one works for their own environment or application. Naturally, they share the same Properties as well.

- For example, the MailFolder from where the Emails will be fetched. By default, it is set to Inbox for all Get Mail activities.

- Helps to fetch only Unread Messages and works perfectly with MarkAsRead, which eliminates reprocessing and getting the same Emails every time.

- Next, we have the Top property which limits the number of incoming Emails and has a value of 30 by default.

- This property helps to set up a Server connection and requires the input of the server address and port along with the User name and Password.
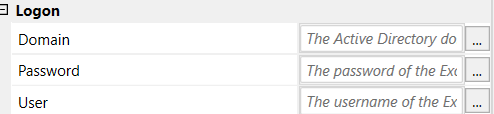

- It is important to note that this Server, User name, and Password settings are only necessary for IMAP and POP3 and hence they show validation errors when these fields are empty.
- Hence, automating Outlook, IBM Notes or Exchange requires much less effort and also has an additional feature of EmailAutoDiscover that searches for required parameters without any user input.

Using IMAP to Read Emails
- To read messages using IMAP we need to set up a server and port and also input Username and Password.
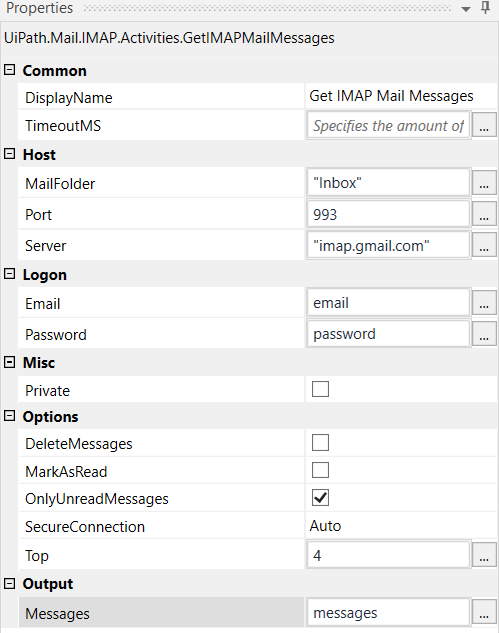
- In this tutorial, we will simply use a Gmail account which has a server of "imap.google.com" with Port 993.
- Inside Email, we have supplied a variable containing an email address, and similarly, for the password, a variable has been supplied.
- This information can be assigned directly to a variable using Assign or Get Password or the user may also Get Credentials to collect them from Windows.

- We only want to read the first 4 Emails that are marked Unread. The final output is saved inside a Mail List variable called message.
- Now we will use the For Each activity to create a loop for all the Emails that are read.
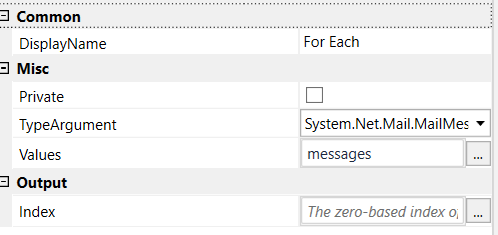
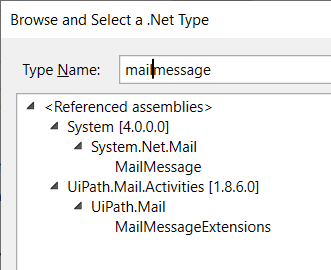
- We also need to the TypeArgument to System.Net.Mail.MailMessage type variable using the Browse option manually. Also, instead of For Each item, we will use For Each mail, which is necessary to identify all Emails that were read.
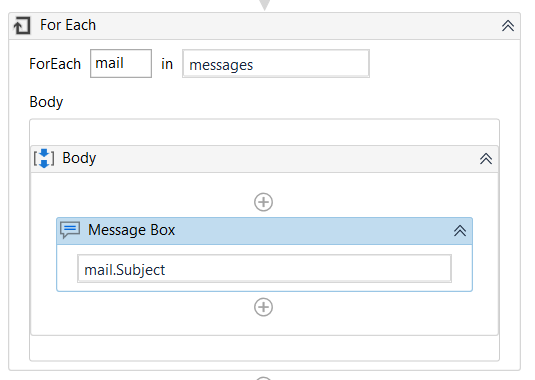
- Next, we will use a Message Box to display the Subject of all the first 4 unread Emails using the syntax mail.Subject.
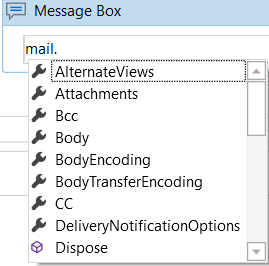
- It is important to note that, putting a dot after mail allows you to select a wide range of Email properties as per requirements.
- Executing this workflow will read the Subject of the first 4 unread Emails one by one.
Filtering Emails and saving attachments
- Suppose a user needs the UiPath Robot to check unread messages and download attachments only from the ones that contain the subject line "Employee Details".
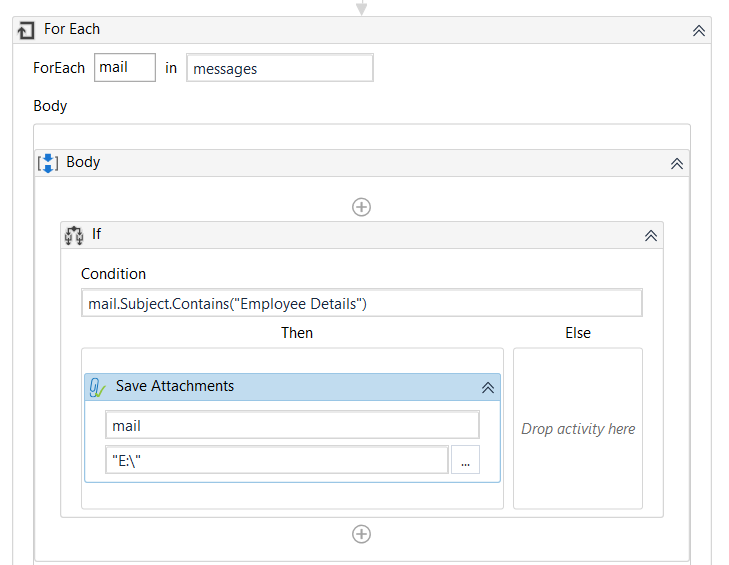
- To do this we will again use the same For Each mail loop, but include an If as well as Save Attachments activity as shown in the image.
Sending Emails
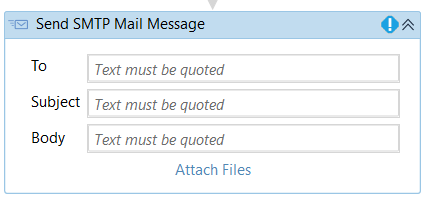
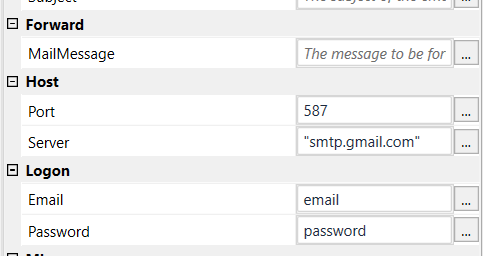
- For this activity, we will the Send SMTP Mail Message activity and much similar to IMAP, this requires setting up Port, Server, Username, and Password.
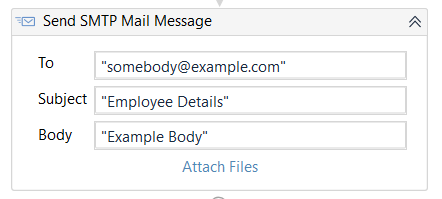
- Next, we need to fill in the Subject, Body, and recipient's address as shown in the image. The user is allowed to send files as well using the Attach Files option.
Don't have an account? Sign up!