
Exploring the Graphical User Interface (GUI) in UiPath Part 2
Exploring UiPath GUI Part II
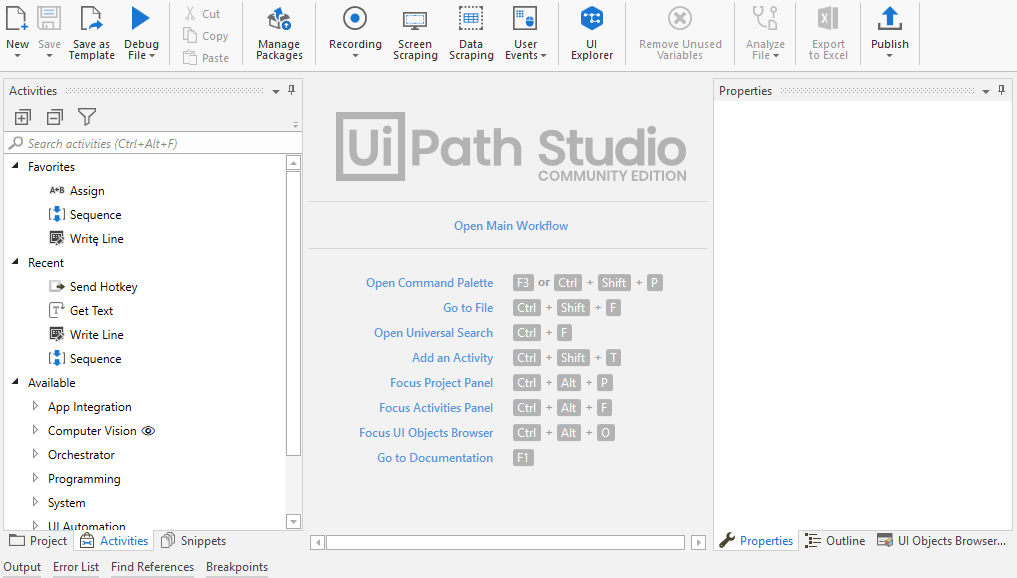
In this tutorial, we will jump right inside the UiPath Main Workflow window. After the user creates a new Blank Process, he/she is presented with this screen
- Upon clicking on the “Open Main Workflow”, the user is presented with a blank white Workspace with a “Drop Activity here” option.
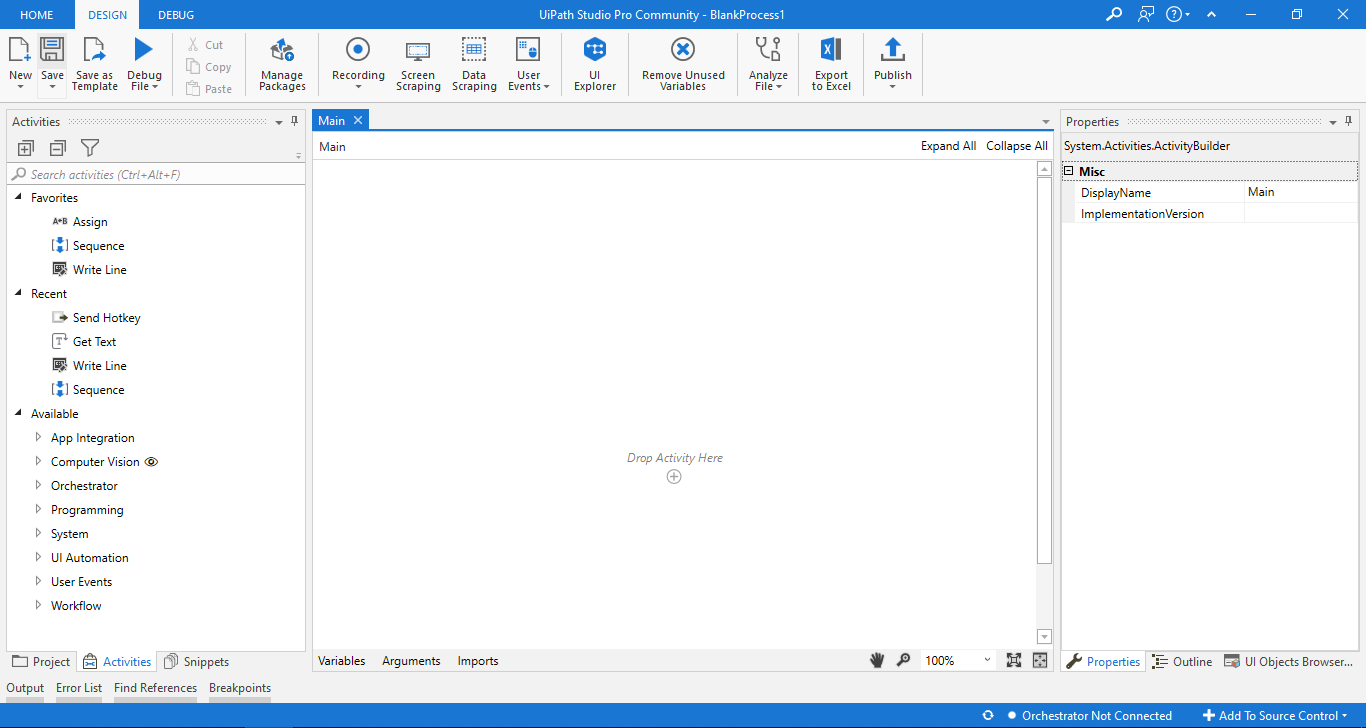
- On the top left corner lies three tabs containing the Home, Design, and Debug tabs. Let us start by introducing each element under these tabs one by one.
- Clicking on the "Home" takes the individual to the UiPath Startup screen. Our main elements lie inside the Design and Debug tabs.
The Design tab

New
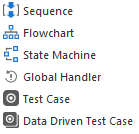
This allows us to create a new workflow based on a user's requirement. The above image highlights all the options from which a user can choose from.
Save
This simply helps to save the current project to the working directory. It also includes the "Save as" functionality. The current project can also be saved using the popular Ctrl + s shortcut.
Save as Template
Saves the current workflow in the form of a template that can be used as a base foundation to create future projects with ease.
Debug File
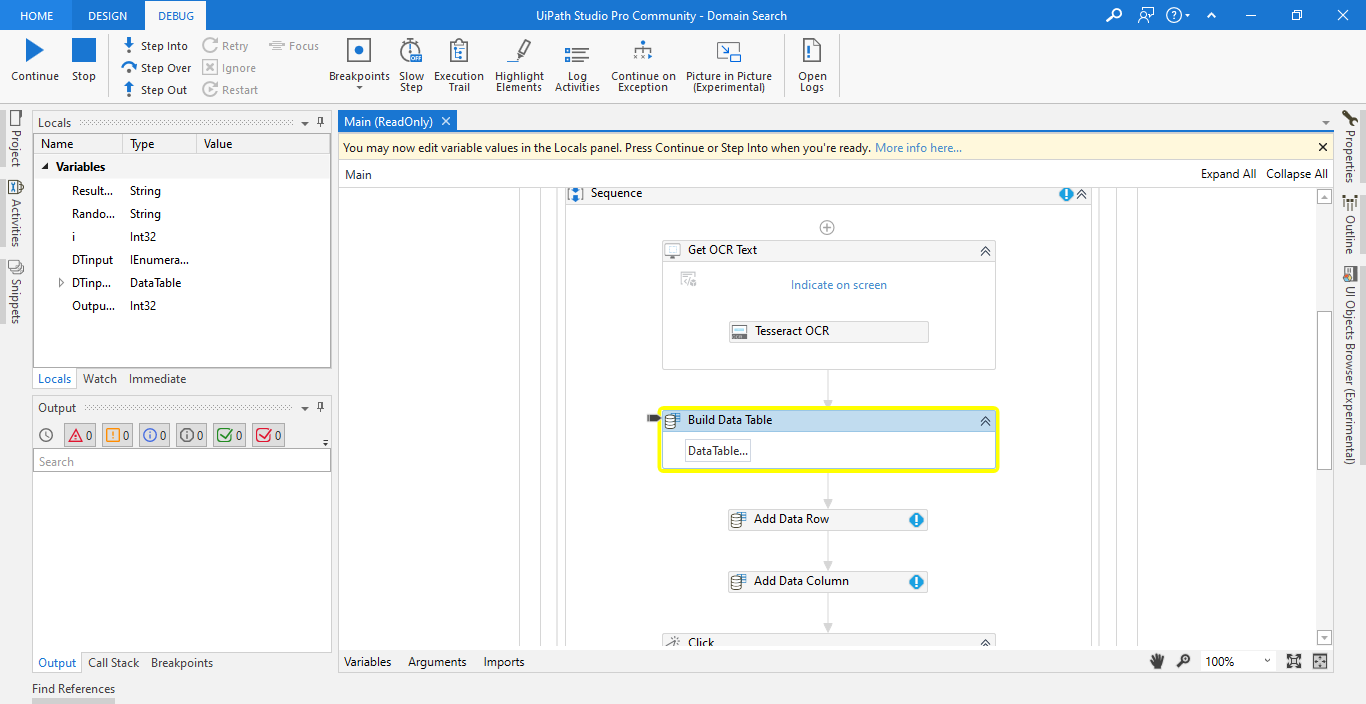
Allows debugging the workflow sequence wise, from one activity to the other. The debug option simply runs the workflow inside a debugging screen and highlight each activity in yellow as it runs to let the user understand better. When an error occurs, it stops the execution and marks the activity with red.
Manage Packages
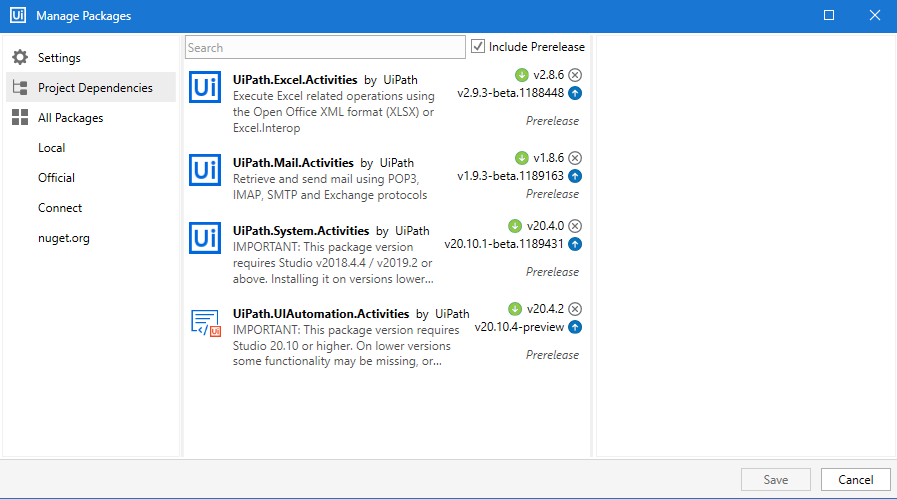
UiPath allows importing customized community-created packages much like many other popular programming languages. This option opens the Manage Packages wizard. It includes various options starting from downloading packages to installing packages from local directories.
Project dependencies containing prepackaged application-based activities can also be updated or downloaded using this manager.
Recording

One of the most important tools in UiPath is record functionality. It is much similar to Excel’s record macro functionality and therefore records user actions and writes into a workflow sequence. An entire automation script can be developed using the recording functionality alone.
Screen Scraping

Allows an individual to scrape all visible data on the screen. This is helpful to extract data from PDFs, images, captcha, and much more.
Data Scraping

This brings up an extensive wizard that allows us to scrape any data from a webpage, file, or document which is in a tabular or list format. It allows us to extract text as well as URL inside a text which can be tabulated into user-defined columns.
The Data Scraping activity can detect scrape multiple web pages using pagination. The final output is saved into Data Table that can be written into CSV or Excel file.
User Events

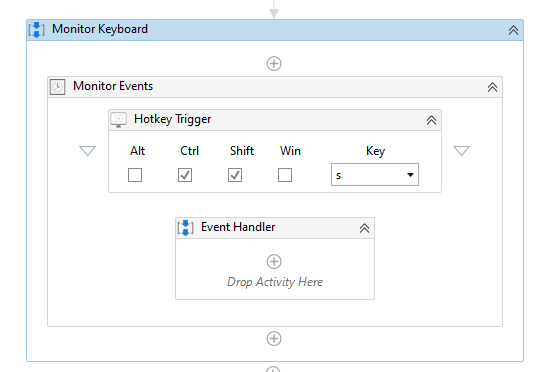
Another important tool in UiPath which contains various options that trigger UiPath's Robot to act. For example, a user can create an automation script that copies selected data into the data table whenever Ctrl + Shift + C is used using the "Monitor Keyboard" activity.
UI Explorer

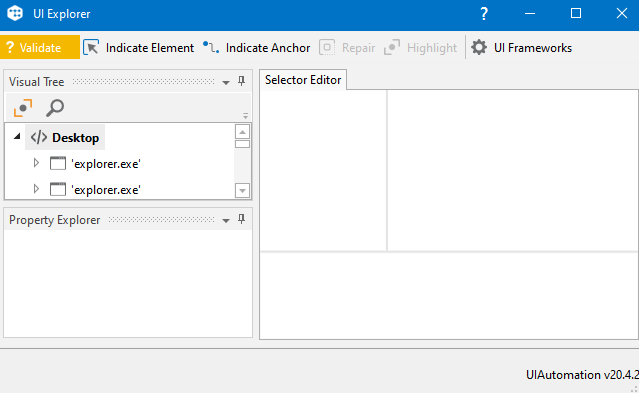
This is an inbuilt explorer inside UiPath which identifies all elements and selectors, in a webpage, file, or application. This is extremely helpful in determining the correct selectors or for searching the required information inside an element.
Remove Unused Variables
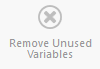
On a single click, this removes all variables that are not used in the workflow.
Analyze File

This analyzes the entire workflow to output a detailed summary of the entire sequence. This also includes the option to validate the workflow which checks for errors and bugs.
Export to Excel

The entire workflow sequence is exported into a .XLSX file, that can be saved anywhere.
Publish

Helps to publish the current project into the UiPath community.
The Debug tab

Stop
It stops the execution of a project. The same outcome can also be achieved using the F12 hotkey.
Step Into
The Step Into option can be used for debugging each activity separately. Upon using this action, the debugger window opens up, and then it highlights the activity in yellow before execution. The same action can also be triggered using keyboard shortcut F1
Step Over
This activity is used to debug the next activity and skips over the current container and highlights containers (for example, sequences and flowcharts) instead of executing them. The F10 keyboard shortcut can be used to perform this action.
Step Out
This action can be used to step out of a container and stop the execution at that point. However, it completes the execution of the current container before stopping the debugging. Step Out can be triggered using the Shift + F11 hotkey.
Breakpoints
This pauses the execution of the current activity and highlights it. This is used in conjunction with other activities for debugging purposes.
Slow Step
This allows a user to slow down the execution of a particular container or activity according to an individual’s requirement. The speed can be changed from 1x to 4x.
Execution Trail
This highlights each activity as the workflow is executed step by step. This is helpful to debug complex workflows and sequences with ease,
Highlight Elements
This action highlight UI elements during the debugging process.
Log activities
This creates a log for each activity that runs that incorporates its output as well as the input results in a detailed format on the Output Panel. These logs can be saved locally or sent to the Orchestrator.
To save the logs locally just disable “Allow Development Logging” from the Settings tab in the UiPath Studio welcome screen.
Continue on exception
When disabled, the debugging operation stops as soon as there is an error during execution. Enabling this continues the execution even when an error occurs and logs the same in the Output Panel.
Open Logs
Helps to open logs that are saved locally or saved on the cloud using Orchestrator.