
Creating and Configuring a Salesforce Site
Often business requires sites that can be accessed publicly, but the site is integrated to Salesforce in the backend. A good example will be a site, where customers can submit orders, and the order number is submitted to the Salesforce Org in the background. Some business will not want their customers to login with their username and password, into the salesforce org, just to eliminate any form of added complexities. In this case, as well, the Salesforce site is going to the best bet.
Creating a Salesforce site
Creating a salesforce site is not complex at all. We can do it in a breeze with a few simple steps. These steps are listed below,
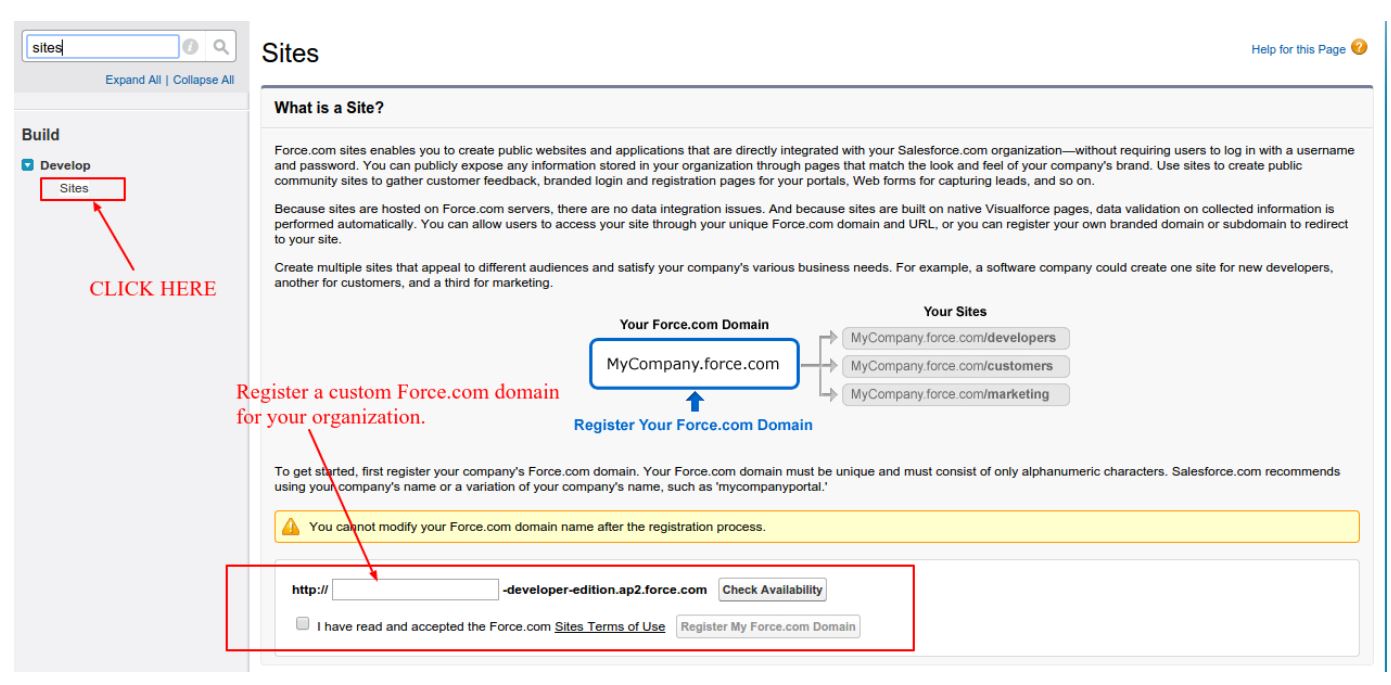
- Go to Setup, type Sites in the Quick Find box, then select Sites.
- Register a custom Salesforce Sites domain for your organization.
- In the next step, create the site and configure it.
- Develop the Visualforce pages, as required.
- Use the developed Visualforce pages for the site, (You can use as well as hide the standard pages)
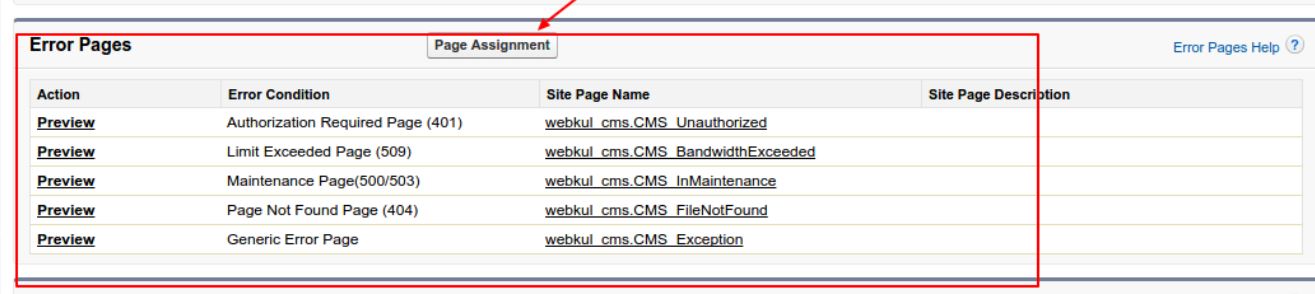
- Customize out-of-box error pages(If it cant be customized, you can replace).
- Associate the customized pages with the site.
- Choose a given site template.
- The best way will be to use the lookup field to find a template that you’ve already developed, if not use the provided template.
- The site template specifies the page layout and stylesheet for your site.
- Here, you must note that the site template overrides any formatting inherited from the associated portal.
- Enable a portal for login or self-registration.
- Post enablement, associate it with your site.
- In the next step, click Activate on the Site Details page.

- The site can be activated your site from the Site Edit and Sites pages.
Before you activate the site for the public, make sure it is completely prepared. However, if you want to make any changes, then you can always edit the sites. We can simply go to the site option from a quick find. Some of the key entities that can be edited are:
- Site Label: This is the name of the site that appears on the UI.
- Site Name: This is the name, used for referencing SOAP API.
- Default Web Address: This will be the unique Salesforce Site URL for this site. In practice, Salesforce Sites provide the first part of the URL based on the domain name that you registered. You have to add a unique site name to the end.
- Siterobots.txt: Specifies which part of the site can be accessed by the web robots.
- Analytics tracking code: This option specifies and integrates the tracking for the site, such as Google analytics.
- Enable Browser Cross-Site Scripting Protection: This protects the site from any form of cross-site scripting attacks.
Configuring Salesforce sites
Once the salesforce site is set up, we can configure it further by tweaking the settings. This could be the security settings, or it could be the page settings. If you are an experienced developer, you can just play around with them. To configure, we will go to the Sites page, and select the desired which we have already created. Next, follow the steps given below.
- Click on Edit to make changes to the site, once you have selected the desired site.
- Click Public Access Settings to view or edit the security settings (This includes permissions, page layouts, and other settings).
- Click Login Settings to configure the login and registration settings for the selected site. Built-in login and registration logic allows users to register quickly, and log on to the portal at ease, from the public site.
- Click on the URL Redirects option, to see any page redirects have been set up or not.
- Click Activate or Deactivate to change the active status for your site.
Apart from the mentioned settings, many other settings can be changed for the selected salesforce site. By configuring the salesforce site, we can add a greater level of customization to our salesforce site.