
Setting up a developer environment in Salesforce with Visual Studio Code
The most powerful feature of Salesforce is the level of customization that it allows. With the developer options, new web controls, custom web apps can be developed for customizing the salesforce environment. To start developing on the Salesforce platform, the development environment needs to be set up first. This can be accomplished with the steps described below.
Setting up the editor
The first step for setting up the developer environment will be setting up the code editor. This is where the developers will write their code to create customization on the salesforce application. The most preferred code editor for salesforce is Visual Studio Code because it comes with the Salesforce extension pack that is compatible with Salesforce components such as Salesforce CLI, Apex, and Lightning component framework. Visual Studio Code can be downloaded from its official website mentioned below.
https://code.visualstudio.com/
Once it is downloaded it needs to be installed as an application.
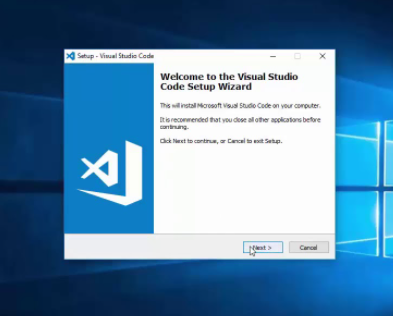
It’s open-source software, and available on all the three platforms Windows, Linux, and Mac.
Post-installation of Visual Studio Code, the salesforce extension pack needs to be installed. To do this.
- Launch the Visual Studio Code application.
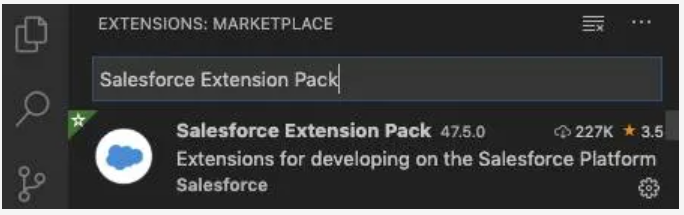
- Navigate to the extension's icon, located on the left toolbar.
- In the search box type “Salesforce Extension Pack”, and then click on Install once the extension pack is listed.
- Post-installation of the extension pack, open the command palette by using the key combination “ctrl + alt + p”, and enter the command “ sfdx”.
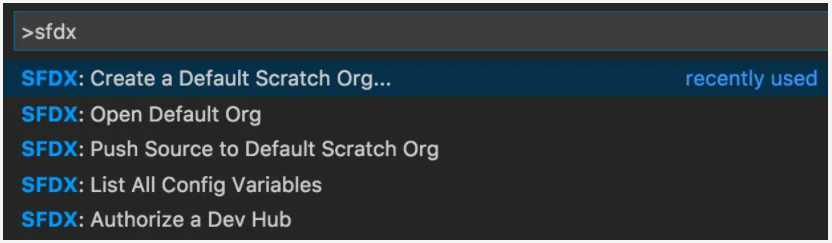
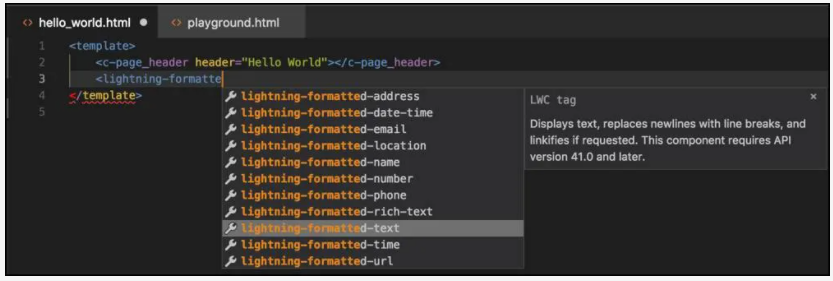
This will show the commands provided by salesforce extensions and can be used for developing the lightning web component.
The code editor is all set to be used for developing a new lightning web component.
Set up the Linting
The errors in a particular code need to be detected through the Linting. Linting allows error detection even before the compilation of the code. Linting checks the spellings, code pattern, etc. The Linting rules are created by Salesforce, to enforce a precheck for the creation of web components. Linting can be implemented for VSCode through the ESLint package. ESLint extension can be directly installed from the VS Code marketplace. It can be installed globally as well by running the following command.
npm install -g eslint
The second option can be tried if you are unable to install the extension VS Code marketplace.
Once ESLint is installed, we can run it once to validate the installation.
.\node_modules\.bin\eslint –init
Setting Up a development org
In the next setup sign up for developer edition org. This can be done from the link given below.
https://developer.salesforce.com/signup

Why you should signup for developer edition org?
- Developer edition gives direct access to the lighting platform that can be used for custom development of web apps.
- It provides access to the invaluable Salesforce APIs.
- It allows integration with other applications.
- It allows for developing new applications and tools.
- It allows access to some of the features that are available only in the enterprise edition.
Signing up for developer edition org can be done in a few steps:
- Enter your contact details (Name and Email)
- Enter your username that should be unique.
- Submit the form with complete details.
- Get the welcome email from Salesforce.
- Set your new password through the link given in the welcome email.
Here the apps can be developed as scratch org and non-scratch org. In scratch org, the source code and metadata of the Salesforce app is completely source driven and deployment is disposable. These apps are fully configurable and are meant for automation or reused by developers. A non-scratch org is created in an environment similar to the Sandbox environment. These are the apps that are created for a specific purpose with a specific feature. To create the scratch org apps, set the org as Dev Hub. This can be done in a few quick easy steps given below:
- Login to your Salesforce Developer edition as a system administrator.
- Navigate to set up, and look for Dev Hub from the quick find box.
- Once the Dev Hub option is listed, enable it.

Setup Your domain
With the salesforce domain, the domain of the business needs to be setup. For example, my mybusiness is a subdomain, the salesforce domain, the complete link will be read as mybusiness. Salesforce. Com. This can be done with the following steps.
- Register for an available domain.
- Log in to Salesforce developer edition, and go to setup.
- From the quick find box, search for “My Domain”.
- Now enter your chosen domain name, and check for its availability.
- If it is available, it will give the option for “Register Domain”.
- Post this salesforce will start provisioning the given domain (This might take up to 24 hours.)
- Post successful provisioning of the domain, a confirmation email will be sent by salesforce.
- Logout of your org profile, and log back in with the domain URL shared in the confirmation email.
- Post login, go back to the “My Domain” page, and select the option “Deploy to Users”, and then click on “Ok”. This will deploy the domain, and make it available to the users.
- In the next step update your Salesforce Org for the new domain. This will ensure that all the old URLs now point towards the new domain.
Enabling the Debug Mode
The last step in setting up the environment mode is setting up the debug mode. This will help to debug the Javascript code. This can be done from the setting, and then look for “Debug mode” in the quick find box. Then enable the debug mode.
Your developer environment is ready. You can start creating lightning web components, and deploy it in your org.