
Profiles in Salesforce
Not all the users will have the same set of privileges, they will have a different set of permissions and privileges base on their profile. The profile defines what a particular user can do when he is logged into salesforce. It depends a lot on the job role of the user. Each profile will have different views. For example, the sales rep is going to have a customized view for this job role, while the sales manager will have a different view based on his job role, and it might include the view of the sales rep as well. In simple words, the profile defines the boundary of the user. The good part is, Salesforce allows the creation of standard profiles as well as custom profiles. We will check more on them in this tutorial.
Standard Profiles
This is available in every org and can be assigned to users. Only some of the settings can be edited in standard profiles. Most of the salesforce editions support the standard profile, this includes Unlimited, Professional, Enterprise, and Developer editions. In these editions, we can create as well as edit the standard profiles, and delete them if it is not required.
We can create standard profiles for those orgs as well where custom profiles are not allowed, such as Group Editions and Contact Manager. In these orgs, the standard profile can be assigned to the users, but the admin can’t view them or edit them. Some of the common permissions assigned to the standard profile are the following:
Standard Platform User:
With this privilege, users can use the custom Salesforce AppExchange apps that have been developed in your org, or it has been installed from the AppExchange. The user is also entitled to use the core platform functionalities.
System Administrator:
Users with this privilege can configure as well as customize the application. These users will have access to all those functionalities, which doesn’t require any additional licenses.
Standard Platform One App User:
With this privilege, users can use one custom Salesforce AppExchange apps that have been developed in your org, or it has been installed from the AppExchange. The tabs in the app should be limited to five. It means it cannot have more than five tabs.
Standard User:
This type of user can create all major types of records, and edit them accordingly. They can run reports, and view the org setup.
Customer community user:
These users can log in, only via a community. The community settings along with the sharing model determine their access and views on Salesforce.
Partner User:
These are the users who will log in via a partner portal or a community.
Solution Manager:
These users will be able to review solutions and publish them post review.
Marketing User:
These users can perform multiple tasks related to marketing such as managing the leads, managing campaigns, create templates, etc. Additionally, they will have privileges as a standard user as well.
Contract Manager:
These users can perform certain tasks related to the contracts. They create and edit contracts. They can activate created contracts. They can approve and delete contracts.
Chatter Moderator:
Can perform admin tasks for chatter, such as revoking privileges from users, delete any posts and comments, removing users, etc.
Creating Profiles in Salesforce
- To create a profile, we can follow the steps given below.
- Go to Setup and then click on “Setup Home”.
- From the quick find box, loop for “Profiles”.
- Click on profile, and then “New Profile”.
- In the next screen, select an existing profile that is already defined, and provide the profile name. Click on “Save”.
The profile has been created.
The profile has been created, and it can be assigned to a user. Go to setup, and then from quick find go to “Users”. Click on “New User”. On this screen, you will get the “Profile” option. Click on the dropdown box, and select the appropriate profile from the list. Fill in the other details. The new user with the selected profile has been created.
Cloning a profile
Instead of creating a new profile altogether, we can clone an existing profile. Cloning an existing profile saves your time and effort.
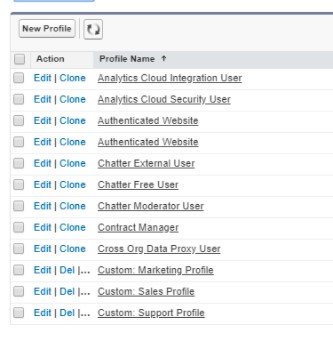
- Go to Setup, and from the quick finds box, go to “Profiles”.
- Go the Profile screen. You will find all the profiles listed here.
- Beside each of the profiles, there will be two options. That is edit and clone.
- Select the profile that needs to be cloned, and click on “Clone”.
- In the next screen, enter the name of the new profile that is getting cloned to the other profile.
- Click on “Save”. Your new profile cloned on an existing profile has been successfully created.
Custom Permission to profiles
With custom permission, we can grant access to custom processes and apps.
- To do this, first, you have to create custom permission. Associate that permission with an app or process, and then enable it for a particular profile.
- To enable custom permissions, we can get to “Profiles” from Setup.
- Select a profile and click on “Custom Permissions”, and then click on “Edit”.
- Now in the next screen, add the custom permission from the available custom permissions list, and click on “Add”.
- Click on “Save”, and custom permission is enabled for the particular profile.