
Custom Report Types in Salesforce
We can create custom report types with custom objects. Custom reports also allow us to create custom views such as opportunities. Apart from this, when you are not looking to use the standard reporting formats, then use custom report types. That is why Salesforce is known for its powerful reporting features. We can use the out of box standard reporting features, however, sometimes the report requirements might be different That is when we need to opt for the custom reports. Just imagine, you need to create a report with two objects, or you are looking to create a report without any relationship between the records. There might be multiple requirements where you will like to custom reports.
Features of custom reports
Custom reports have certain distinct features, which differentiate it from other reporting formats. These features are described below:
- We can build a report with up to four layers of objects, as long as they have parent-child relationships. This means we can work with multiple objects.
- With custom report types, fields can be added into the report from any of the related objects.
- We can reorder sections and fields in a custom report. We can also create new sections and fields in a custom report, and remove them if not required.
- We can define the default columns in the report. This means that these columns will be displayed on the report, whenever a new report is created.
Creating custom reports in Salesforce
Before you start creating a custom report, you should log in as a “Salesforce Administrator” or login as a user with “Manage Custom Report Types” privilege. Let's look at the steps required for creating the custom report.
- Login to your Salesforce account, and ensure that you have the required privileges.
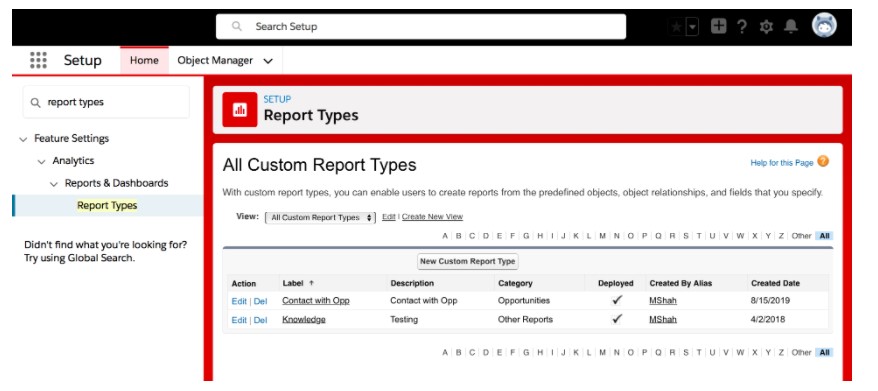
- Go to Setup, then go to “Report Types” from the quick find box.
- Click on “New Custom Report Type”.
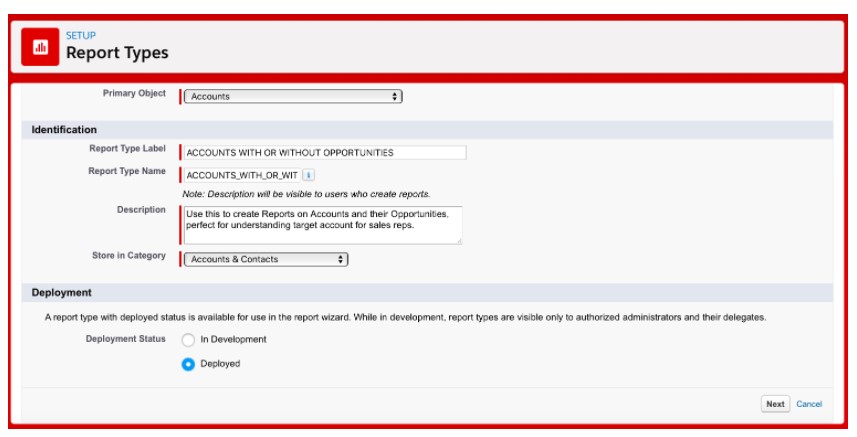
- Now you have to select the primary object, lets assume it is “Accounts”. Hence, we will select “Accounts”. Whatever primary object you select, its records will be always present in the report. Once the primary object is selected, and fill the following details.
- Report Type Label
- Report Type Name
- Description
- Now select the “Category”, it will define what the users will view when they access the report.
- Now click on “Deployed”.
- Click on “Next”. Our custom report is defined. In the next step, we will prepare the Report Recordset.
- You will find a box with a dotted border that will mention “Click to relate to another object”. Click on this box, and select “Opportunities”.
- In the Box B, select the option “Each “A” records may or may not have related “B” records. This will mean that the “Account “ object might have the “Opportunities” object, or it might not as well.
- Now we will define the report layout, click on “Edit Layout”.
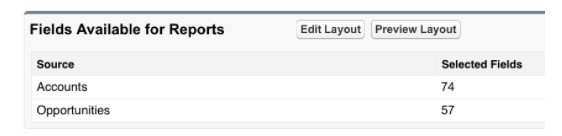
- It is time to select the fields for the report. Select the fields from the right-hand pane, and drag it to the grey grid layout located on the left side.
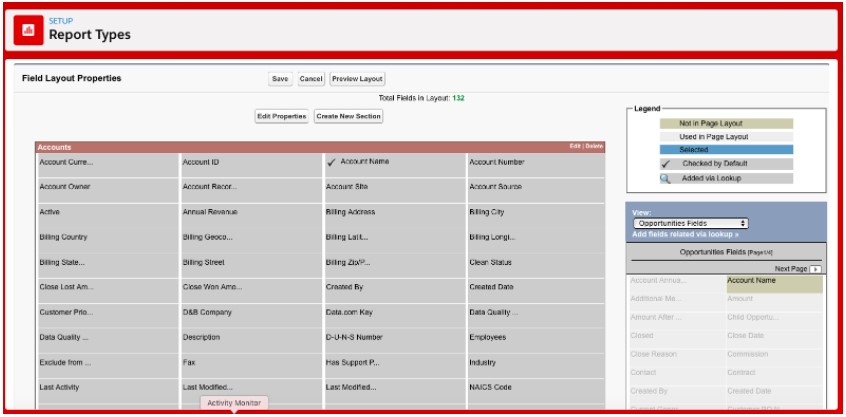
- You can preview the report. You can also edit the section or add a new section.
- Once done click on “Save”, the custom report is created.